SpringSecurity入門到實戰
前言:放假了一直在敲項目,以前敲的品優購項目,下載尚未更新文章,其實已經作完幾個大模塊了,之因此遲遲沒有更新就是,敲着停不下來,由於寫文章實在是太費時間了,就捨不得停下來,這段時間敲的太多了,仍是更新一下,當作複習吧。此次講的是SpringSecurity安全框架,可能相對比shiro來講SpringSecurity會複雜的多,更多的公司會使用shiro,由於shiro簡單易上手,基本已經知足通常公司的安全登陸操做了。可是仍是要學一下SpringSecurity的,畢竟有大廠在用,也是Spring家族中的東西。html
1、spring security 簡介
spring security 的核心功能主要包括:java
- 認證 (你是誰)
- 受權 (你能幹什麼)
-
***防禦 (防止僞造身份)web
其核心就是一組過濾器鏈,項目啓動後將會自動配置。最核心的就是 Basic Authentication Filter 用來認證用戶的身份,一個在spring security中一種過濾器處理一種認證方式。
 spring
好比,對於username password認證過濾器來講, 會檢查是不是一個登陸請求;是否包含username 和 password (也就是該過濾器須要的一些認證信息) ;若是不知足則放行給下一個。express
下一個按照自身職責斷定是不是自身須要的信息,basic的特徵就是在請求頭中有 Authorization:Basic eHh4Onh4 的信息。中間可能還有更多的認證過濾器。最後一環是 FilterSecurityInterceptor,這裏會斷定該請求是否能進行訪問rest服務,判斷的依據是 BrowserSecurityConfig中的配置,若是被拒絕了就會拋出不一樣的異常(根據具體的緣由)。Exception Translation Filter 會捕獲拋出的錯誤,而後根據不一樣的認證方式進行信息的返回提示。瀏覽器
注意:綠色的過濾器能夠配置是否生效,其餘的都不能控制。tomcat
2、SpringSecurity入門實戰
- 建立一個普通的maven工程,打包方式爲war
-
在 src/main/resources中加入以下文件安全
spring-security.xmlapp
<?xml version="1.0" encoding="UTF-8"?>
<beans:beans xmlns="http://www.springframework.org/schema/security"
xmlns:beans="http://www.springframework.org/schema/beans" xmlns:xsi="http://www.w3.org/2001/XMLSchema-instance"
xsi:schemaLocation="http://www.springframework.org/schema/beans http://www.springframework.org/schema/beans/spring-beans.xsd
                    http://www.springframework.org/schema/security http://www.springframework.org/schema/security/spring-security.xsd">

    <!-- 設置頁面不登陸也能夠訪問 -->
    <http pattern="/login.html" security="none"></http>
    <http pattern="/login_error.html" security="none"></http>

    <!-- 配置頁面的攔截規則  use-expressions="false"是否啓用SPEL表達式-->
    <http use-expressions="false">
    <!-- 當前應乎必須屬於ROLE_USER這個角色,才能夠訪問根目錄以及所屬子目錄的資源 -->
        <intercept-url pattern="/**" access="ROLE_USER" />
        <!-- 開啓表單登陸的功能 -->
        <form-login login-page="/login.html" default-target-url="/index.html" authentication-failure-url="/login_error.html"/>
        <csrf disabled="true"/>
    </http>

    <!-- 認證管理器 -->
    <authentication-manager>
        <authentication-provider>
            <user-service>
               <!--表示配置用戶屬於ROLE_USER而且配置用戶登錄的密碼和帳號-->
                <user name="admin" password="123456" authorities="ROLE_USER"/>
            </user-service>
        </authentication-provider>
    </authentication-manager>
</beans:beans>框架
這裏的不少東西都有註解了,說一下沒有註解的標籤,form-login標籤表示配置一個登錄的功能,login-page="/login.html"表示配置咱們本身登錄的頁面路徑,如果沒有配置form-login這個標籤,SpringSecurity會自動幫咱們生成一個登錄的頁面,可是都不會用SpringSecurity給咱們生成的登陸頁面,authentication-failure-url標示密碼或者帳號錯誤跳轉的頁面,default-target-url表示密碼或者帳號正確登錄後跳轉的頁面,<csrf disabled="true"/>表示關閉csrf

 3. 配置web.xml
<?xml version="1.0" encoding="UTF-8"?>
<web-app xmlns:xsi="http://www.w3.org/2001/XMLSchema-instance"
xmlns="http://java.sun.com/xml/ns/javaee"
xsi:schemaLocation="http://java.sun.com/xml/ns/javaee http://java.sun.com/xml/ns/javaee/web-app_2_5.xsd"
version="2.5">
<context-param>
    <param-name>contextConfigLocation</param-name>
    <param-value>classpath:spring-security.xml</param-value>
 </context-param>
 <listener>
    <listener-class>
        org.springframework.web.context.ContextLoaderListener
    </listener-class>
 </listener>

 <filter>
    <filter-name>springSecurityFilterChain</filter-name>
    <filter-class>org.springframework.web.filter.DelegatingFilterProxy</filter-class>
 </filter>
 <filter-mapping>
    <filter-name>springSecurityFilterChain</filter-name>
    <url-pattern>/*</url-pattern>
 </filter-mapping>
</web-app>
這個就是個Spring的配置文件而已,相信不少人都能看懂
 4. 建立html頁面

index.html
<!DOCTYPE html>
<html>
<head>
<meta charset="UTF-8">
<title>首頁</title>
</head>
<body>
<h1>歡迎進入進入神奇的Spring-Security世界</h1>
</body>
</html>
login_error.html
<!DOCTYPE html>
<html>
<head>
<meta charset="UTF-8">
<title>Insert title here</title>
</head>
<body>
<h1>用戶名密碼錯誤</h1>
</body>
</html>
login.html
<!DOCTYPE html>
<html>
<head>
<meta charset="UTF-8">
<title>登陸</title>
</head>
<body>
--歡迎登陸個人系統--
<form action="/login" method="post">
用戶名:<input name="username"><br>
密碼:<input name="password"><br>
<button>登陸</button>
</form>
</body>
</html>
注意:特別說明一下login.html中東西,裏面的form表單的提交,其中name="username"和name="password" 是必須的,由於SpringSecurity中默認就是以username和password來接受的,固然這個名字也能夠改,可是通常沿用它的就好了,不必改,而後就是form表單的提交必須是method="post",提交的動做必須是action="/login",通常不作修改。 ##### 項目的目錄結構爲 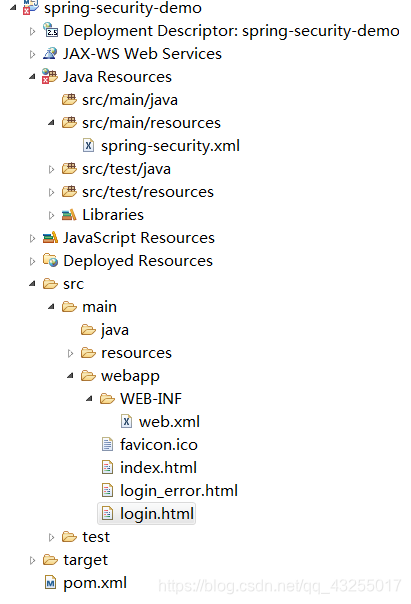 ### 3、測試 啓動項目,由於是war項目,因此要配置tomcat來啓動,啓動的命令直接就是tomcat7:run就好了,如圖表示啓動成功,而後直接粘貼這個url到瀏覽器進行訪問 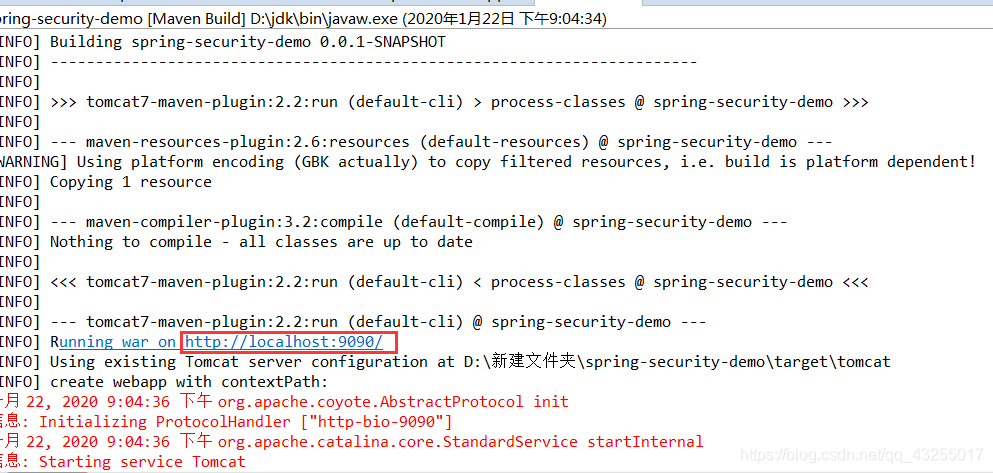 登錄頁面如圖所示,咱們直接輸入localhost:9090/index.html是不容許的,會被重定向到login.html頁面中,如 圖所示 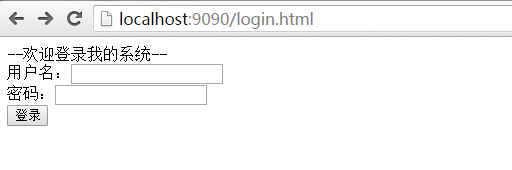 而後輸入錯誤的密碼或者帳號,如圖所示,就會被重定向到錯誤的頁面,這個使咱們本身配置的 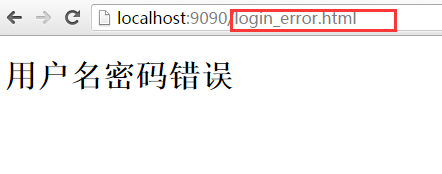 最後輸入正確的密碼和帳號,如圖所示,就會直接t跳轉到index.html頁面中 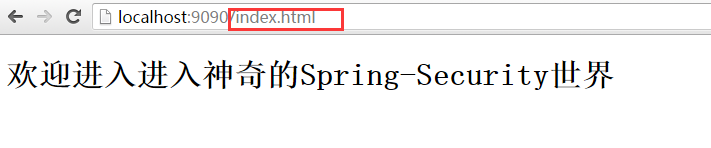
- 1. kylin入門到實戰:入門
- 2. Redis從入門到實戰:實戰篇
- 3. docker從入門到實戰-實戰篇
- 4. SpringSecurity的入門
- 5. SpringSecurity入門demo
- 6. springsecurity入門
- 7. Flask入門到實戰
- 8. Flutter從入門到實戰
- 9. nmap從入門到實戰
- 10. Python入門到實戰
- 更多相關文章...
- • Memcached入門教程 - NoSQL教程
- • Neo4j數據庫入門教程 - NoSQL教程
- • Java Agent入門實戰(一)-Instrumentation介紹與使用
- • Java Agent入門實戰(三)-JVM Attach原理與使用
-
每一个你不满意的现在,都有一个你没有努力的曾经。
- 1. No provider available from registry 127.0.0.1:2181 for service com.ddbuy.ser 解決方法
- 2. Qt5.7以上調用虛擬鍵盤(支持中文),以及源碼修改(可拖動,水平縮放)
- 3. 軟件測試面試- 購物車功能測試用例設計
- 4. ElasticSearch(概念篇):你知道的, 爲了搜索…
- 5. redux理解
- 6. gitee創建第一個項目
- 7. 支持向量機之硬間隔(一步步推導,通俗易懂)
- 8. Mysql 異步複製延遲的原因及解決方案
- 9. 如何在運行SEPM配置嚮導時將不可認的複雜數據庫密碼改爲簡單密碼
- 10. windows系統下tftp服務器使用
- 1. kylin入門到實戰:入門
- 2. Redis從入門到實戰:實戰篇
- 3. docker從入門到實戰-實戰篇
- 4. SpringSecurity的入門
- 5. SpringSecurity入門demo
- 6. springsecurity入門
- 7. Flask入門到實戰
- 8. Flutter從入門到實戰
- 9. nmap從入門到實戰
- 10. Python入門到實戰