Vue全家桶+SSR+Koa2實現美團網
github網址https://github.com/LFY836126/MT-App
慕課實戰視頻:https://coding.imooc.com/class/280.htmljavascript
實戰準備
-
項目安裝:css
- npm install -g npx
- npx create-nuxt-app project-name
- npm install --update-binary
-
- 出現問題:當更改server下面的index.js文件的時候,就是將require改成import後會報錯
- 緣由:由於node自己不支持import這個指令,
-
解決:使用babelhtml
1. 在package.json文件中更改dev和start,都在配置的末尾加上--exec babel-node
2. 創建.babelrc文件,文件內容爲
    {
        "presets": ["es2015"]
    }
3. 安裝插件:npm install babel-preset-es2015
- 支持sass語法,安裝插件:npm i sass-loader node-sass eslint@^3.18
支持axios npm install @nuxtjs/axios前端
nuxt.config.js:
    modules: [
        '@nuxtjs/axios',
    ],
    axios: {

    },
```
版本介紹:vue
-
- Node v10.15.0
- Vue 2.9.6
- NPM 6.4.1
- Webpack 4.1.0
- Nuxt 2.0.0
新知識點的網址:java
-
- koa-passport:
https://segmentfault.com/a/1190000011557953/https://www.jianshu.com/p/622561ec7be2 - axios:
https://segmentfault.com/q/1010000016473273?sort=created - 郵件發送:
https://www.jianshu.com/p/04e596da7d33 - koa:
https://www.liaoxuefeng.com/wiki/1022910821149312/1099752344192192 - koa-route:
https://www.jianshu.com/p/0d59a4270997 - 實戰筆記:
https://www.cnblogs.com/xiaozhumaopao
- koa-passport:
-
項目目錄node
components changeCity -->城市選擇頁面的全部 iselect.vue -->按省份選擇等,那一欄的 hot.vue -->熱門城市 那欄 categroy.vue -->按拼音首字母選擇 那欄 products -->產品列表頁,就是點擊搜索出來的頁面 categroy.vue -->分類,區域的部分 crumbs.vue -->中間哈爾濱美團>哈爾濱失戀博物館 iselect.vue -->分類,區域欄中偏右邊的部分,像周邊遊,香坊區等部分 list.vue --> product.vue --> detail -->產品詳情頁,就是點擊產品出現的頁面 crumbs.vue --> item.vue --> list.vue --> summary.vue --> index artistic.vue -->頁面下半部分,有格調的那個部分 life.vue -->中間包括輪播圖的那部分,幾乎全是圖片的部分 menu.vue -->所有分類部分 silder.vue -->單獨的輪播圖組件,在life.vue文件中引用 public header -->包括搜索框往上面的部分 index.vue -->用於導出header下的其餘組件 nav.vue -->頁面右上角,什麼個人美團,網址導航那部分 searchbar.vue -->整個搜索框部分 topbar.vue -->除了搜索框的全部頂部部分 user.vue -->用戶登錄註冊部分 geo.vue -->頁面左上角,城市切換部分 footer index.vue -->底部部分 pages index.vue -->中間部分 register.vue -->註冊組件 login.vue -->登陸組件 exit.vue -->退出組件 register.vue -->註冊組件 changeCity -->城市選擇組件 products.vue -->產品列表頁 detail.vue -->產品詳情頁 layout default.vue -->最終顯示頁面 blank.vue -->放置register.vue,login,exit的模版文件 server dbs models -->放置數據庫數據 user.js -->users表,包括usename,password,email categroy.js city.js menu.js poi.js province.js config.js -->數據庫配置文件(smtp服務, redis鏈接, mongodb鏈接) interface utils axios.js -->定義axios的配置項 passport.js -->利用koa-passport簡便的實現登陸註冊功能(序列化,反序列化,local策略) users.js --> 登陸系列接口定義(登陸,退出,獲取用戶名,註冊,驗證等) geo.js -->城市,系列接口定義(獲取全部城市,熱門城市,獲取省份等) index.js -->定義支持服務的接口文件(passport, session, 路由, 數據庫, 處理post請求等) store modules -->vuex子模塊 geo.js -->當前城市 home.js -->所有分類下的詳細分類 index.js -->vuex模塊(彙總子模塊而且定義一些操做) redis啓動->找到安裝目錄(develop)->redis-server mongoose啓動->找到安裝目錄(develop)->mongod 支付邏輯在13-1的7.06分處,能夠本身寫 nuxt.config.js 配置文件:能夠引入項目所需文件,像css文件,還能夠配置不少其餘文件 -
邏輯目錄:ios
layouts/default.vue
    header組件
        topBar
            Geo
            User
            navBar
        searchBar
    content:按須要加載
    footer組件
首頁開發
需求分析(模板設計)


-
思考git
-
如何節省網絡請求github
- 有時候能夠考慮將 部分的內容直接寫死
- 如何語義化
- DOM最簡化
-
城市服務組件

- 業務邏輯:
首先瀏覽器發出request請求,創建http鏈接,服務器端能夠拿到request.ip,也就是瀏覽器端向我發起請求的時候,根據http協議,我就能夠知道ip地址,而後我拿到ip地址去數據中心作映射,這個ip對應哪一個城市,而後就可拿到城市名稱,服務器拿到city以後下發給瀏覽器
-
思考:如何節省網絡請求?
-
傳統方法:發送兩次請求
- 當頁面渲染完了,我向服務器發一個請求(能夠是空的內容,由於空的內容也會創建連接),創建連接,拿到ip,而後.....,最後拿到city,也就是組件是在mounted事件以後發送一個請求,而後服務器給你這個城市的名稱,再渲染到組件上去
- 弊端:拿到頁面,獲取城市,一共發了兩次請求,除了浪費請求,還有體驗問題,就是閃了一下
- 節省網絡請求:發送一次請求
-
在請求文檔的時候,那個時候服務器已經知道你的ip了,在那個時候,徹底能夠拿到ip對應的城市,這個數據是能夠當時返回給你的,不須要額外再創建一次鏈接,利用vuex同步狀態,再利用ssr,就能夠作到一次請求就能夠拿到數據
用戶數據&狀態

- 業務邏輯:首先瀏覽器發一個request請求,而後服務器根據passport來驗證當前是不是登陸用戶,passport會查當前redis,由於你發這個請求的時候,它會帶着cookie過來,服務器的passport會用你的cookie再和redis去作認證,若是是登陸狀態的話,它會返回你的用戶名
- 網絡請求和上面城市組件同樣
組件設計:
默認模板配置layouts/default.vue
-
layouts/default.vue
<template> <el-container class="layout-default"> <el-header height="197px"> <myHeader></myHeader> </el-header> <el-main> <nuxt/> </el-main> <el-footer height="100%"> <myFooter></myFooter> </el-footer> </el-container> </template> <script> import myHeader from '@/components/public/header/index.vue'; import myFooter from '@/components/public/footer/index.vue'; export default { components:{ myHeader, myFooter, } } </script> - header部分:mt-app/components/public/header/index.vue
-
footer部分:mt-app/components/public/footer/index.vue
-
footer注意的地方
在default.vue中引入的時候
<el-footer height="100%">
  <myFooter></myFooter>
</el-footer>
這個height必定要設置爲100%, 不然就出現 只有一部分是灰色 的狀況
由於element-ui默認設置爲60px,因此咱們要設置爲100%,就整個背景都是灰色的了
-
定位:geo組件s
-
位置、引入
- 位置:components/public/header/geo.vue
- 在components/public/header/topBar.vue中被引入
用戶登陸:user組件
-
位置、引入
- 位置:components/public/header/user.vue
- 在components/public/header/topBar.vue中被引入
-
登陸部分:登陸或者未登陸兩種狀態
<!-- 登陸 -->
<template v-if="user">
    歡迎你 <span class="username">{{user}}</span>
    <nuxt-link to="/exit" class="exit">退出</nuxt-link>
</template>
<!-- 未登陸 -->
<template v-else>
    <nuxt-link to="/login" class="login">當即登陸</nuxt-link>
    <nuxt-link to="/register" class="register">註冊</nuxt-link>
</template>
右上角->個人美團 手機app 商家中心 網址導航:nav組件

-
nav.vue位置、引入:
- 位置:components/public/header/nav.vue
- 在components/public/header/topBar.vue中被引入
-
個人美團部分
用最簡單的dom結構實現比較複雜交互 由於"個人美團" 這部分的內容既要兼顧着同級平行結構 又要有照顧到下面"個人訂單"等那部分的內容 因此在這裏並不將它和"個人訂單"等部份內容放在一個結構裏,以下: <li class="list"> <nuxt-link to="/my">個人美團</nuxt-link> <dl> <dd><nuxt-link to="/order">個人訂單</nuxt-link></dd> <dd><nuxt-link to="/order">個人收藏</nuxt-link></dd> <dd><nuxt-link to="/order">抵用券</nuxt-link></dd> <dd><nuxt-link to="/order">帳戶設置</nuxt-link></dd> </dl> </li> <li> <nuxt-link to="/order">手機APP</nuxt-link> </li> ... ... -
網址導航部分
官網上這部分的列表結構是有標題有內容
    因此咱們採起利用dl不是ul,,由於dl中dt和dd正好符合標題和內容這樣的結構,以下:
<li class="list site">
    <nuxt-link to="/site">網址導航</nuxt-link>
    <div class="subContainer">
        <dl class="hotel">
            <dt>酒店旅遊</dt>
            <dd>國際機票</dd>
         </dl>
        <dl class="food">
            <dt>吃美食</dt>
            <dd>烤魚</dd>
        </dl>
        <dl class="movie">
            <dt>看電影</dt>
            <dd>熱影電影</dd>
        </dl>
        <dl class="app">
            <dt>手機應用</dt>
            <dd>
                <a href="#">
                    <img
                        src="//s0.meituan.net/bs/fe-web-meituan/e5eeaef/img/appicons/meituan.png"
                        alt="美團app"
                        title="美團app">
                </a>
            </dd>
        </dl>
    </div>
</li>
搜索框部分:searchBar.vue
-
位置、引入
- 位置:components/public/header/searchbar.vue
- 在components/public/header/index.vue中被引入
-
搜索相關邏輯:
- 熱門搜索:聚焦 沒有內容的時候顯示熱門搜索
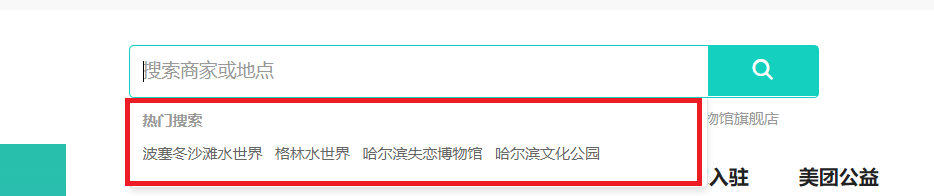
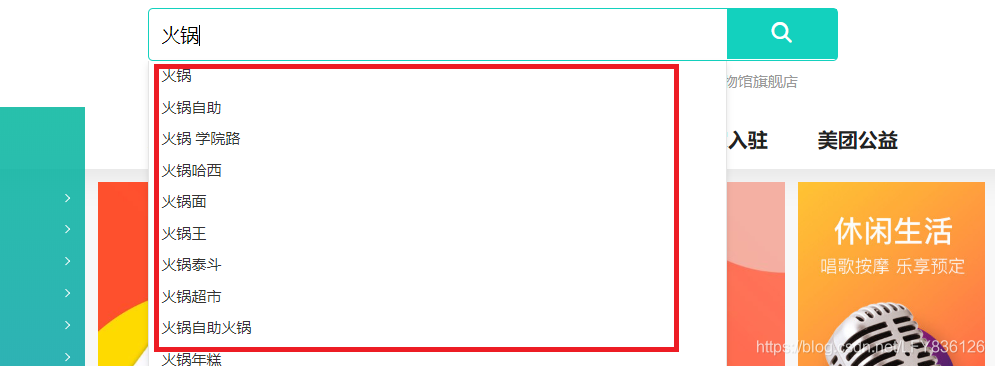
+ 相關搜索:聚焦 有內容時顯示相關搜索
+ 這兩個彼此獨立,放在平行結構中,具體實現以下:
```
1. 利用兩個變量
(1)是否聚焦
isFocus:false,
(2)搜索框內容是否爲空
search: ''
2. 利用計算屬性監聽:
(1)isHotPlace:function(){
//已經聚焦而且搜索內容爲空的時候顯示熱門搜索
return this.isFocus&&!this.search
},
(2)isSearchList:function(){
//已經聚焦而且搜索內容不爲空的時候顯示熱門 搜索
return this.isFocus&&this.search
}
3. 利用v-if決定是否熱門搜索要顯示
(1)熱門搜索欄<dl class="hotPlace" v-if="isHotPlace">
(2)相關推薦欄<dl class="searchList" v-if="isSearchList">
4. 綁定事件,實現聚焦顯示
<el-input placeholder="搜索商家或地點" v-model="search" @focus="focus" @blur="blur"/>
focus: function(){
this.isFocus = true;
},
blur: function(){
this.isFocus = false
},
```
-
問題1:當我聚焦後想點擊推薦中的連接的時候,會先觸發input事件的blur事件,才能點擊,因此在點它(連接)以前,已經觸發了blur事件,致使你點擊這個連接,沒有生效
-
解決:就是我在失去焦點的時候,把isFocus的變化作個延時的處理
blur: function(){
        //setInterval和setTimeout中傳入函數時,函數中的this會指向window對象,因此用self現將this存起來
        let self = this;
        setTimeout(function(){
            self.focus = false
        },200)
    }
-
-
問題2:我怎麼讓推薦的內容隨着個人輸入內容改變,怎麼更改數據發出去
- 方法1:監聽v-model內容,也就是search
- 方法2: 直接觀察input事件,在input標籤中增長
`<el-input placeholder="搜索商家或地點"@input="input"/>`
所有分類部分menu.vue

-
位置、引入:
- 位置:components/index/menu.vue
- 在pages/index.vue中被引入
-
邏輯:
-
結構拆分:一級標題 --->所有分類
數據結構: menu: [ { type:'food', name:'美食', id:11, child:[ { title:'美食', child:['火鍋', '漢堡', '小龍蝦', '烤冷麪', '小可愛'] } ] }, ] dom結構: <dt>所有分類</dt> <dd v-for="(item, index) in menu" :key="index"> <i :class="item.type"/>{{item.name}} <span class="arrow"/> </dd> -
結構拆分:二級標題 --->子分類(美食,外賣,酒店等)
邏輯:每一個標題下面對應的內容都不同,我怎麼肯定當鼠標劃過,我應該顯示哪一個內容呢DOM結構: <div class="detail" v-if="kind"> //在每一個分類子項這樣遍歷 <template v-for="(item,index) in curdetail.child"> <h4 :key="index">{{item.title}}</h4> <span v-for="v in item.child" :key="v"> {{v}} </span> </template> </div> 當鼠標劃過所有分類部分,觸發事件@mouseenter="enter"->enter事件 enter事件 改變kind值爲 鼠標劃過當前i元素(好比說叫x) 的className值 enter: function(e){ this.kind = e.target.querySelector('i').className }, 計算屬性curdetail,當kind改變,從新計算curdetail的值 computed:{ curdetail: function(){ // 設置過濾器 -> 取到全部type和kind相等數據中的第一個 let res = this.menu.filter(item => item.type === this.kind)[0] return res } }, 此時的curdetail中存儲的值 就是x對應menu中的數據,而後在dom中進行渲染 而後鼠標離開所有分類大框後綁定事件,@mouseleave="mouseleave" mouseleave事件:讓kind值爲空,實現鼠標離開後,分類項下的組件不顯示 mouseleave(){ let self = this; let self_time = setTimeout(function(){ //延時的緣由:咱們鼠標移動到分類項下的組件時 //必然:先觸發mouseleave事件,而後kind就爲'' //由於以前設置組件顯示:v-if="kind" //因此此時分類項下的組件又不顯示了,就很矛盾,因此這裏設置了延遲 self.kind = ''; },150) }, -
關於鼠標滑動事件的處理:
由於所有分類下的分類項和分類項下的組件是並行結構
 也就是我要是鼠標移入到分類項下的組件部分,就算作成移出了所有分類
 這樣的話,依照以前的原理,mouseleave觸發事件令kind值爲空,組件就會不顯示
 也就是說,我無法實現:移動到分類項下的組件
 因此要解決這個問題
 <div class="detail" v-if="kind" @mouseenter="temEnter" @mouseleave="temLeave">
 給 分類項下的組件 綁定事件
 @mouseenter="temEnter"
 //-->若是從所有分類出來,移入到是子分類,就將定時器清除,kind不爲''
     temEnter: function(){
         clearTimeout(this._timer),
     },
 @mouseleave="temLeave"
 //-->若是從所有分類移出來,不是移入子分類,那就將kind改變爲空,不顯示子分類
     temLeave: function(){
         this.kind = ''
     }
-

休閒生活、住酒店、我是商家,登陸,二維碼部分:life.vue
-
位置、引入:
- 位置:components/index/life.vue
- 在pages/index.vue中引入
-
中間輪播圖部分:
- 位置:components/index/silder.vue
- 在components/index/life.vue中被引入
- 寫法:參照Element-UI
https://element.eleme.cn/#/zh-CN/component/carousel
註冊組件:register

-
位置、引入
- 位置:pages/register.vue
- 訪問 localhost:3000/register
-
編寫組件
-
建立組件pages/register.vue
1. 表單樣式:參見 Element-UI:https://element.eleme.cn/#/zh-CN/component/form 2. 表單數據見代碼裏的data 3. 中間有個表單驗證規則 一個就是:name,emial什麼的都不爲空 還有一個驗證兩次密碼相不相等的邏輯 // 二次驗證,對比兩次密碼的內容,須要內置一個函數,支持驗證函數的自定義 // validator是一個函數,函數的第一個是rule規則,第二個是value值,第三個是回調 validator:(rule, value, callback) => { if(value === ''){ callback(new Error('請再次輸入密碼')) }else if(value != this.ruleForm.pwd){ callback(new Error('兩次輸入密碼不一致')) }else{ callback() } }, trigger:'blur' - 建立模板:layouts/blank.vue
使用模板
-
export default {
        layout:'blank',
    }
    ```
+ 建立模板緣由:
    由於這個註冊組件樣式上並不須要header和footer,因此不能使用咱們配置好的默認模板:default.vue,要新建一個blank.vue的空模板
數據結構設計

用戶:數據庫設計,接口設計,用戶註冊、登陸邏輯
-
數據庫設計:
server dbs models -->放置數據庫數據 user.js -->users表,包括usename,password,email config.js -->數據庫配置文件(smtp服務, redis鏈接, mongodb鏈接) -
axios和passport.js配置關鍵代碼:
-
server/interface/utils/passport.js:
配置簡單表單驗證,具體能夠上網找關於passport相關語法// passport是全部的node程序均可以應用的,koa-passport是對它進行了一個封裝,適配koa的 import passport from 'koa-passport' // passport-local是passport本地的一個策略 import LocalStrategy from 'passport-local' import UserModel from '../../dbs/models/users' // 第一個參數是一個函數,函數又有三個參數username, password,和回調函數done passport.use(new LocalStrategy(async function(username, password, done){ // console.log(username, password);// 這個username和password就是註冊後進行登陸操做,傳給signin的參數,也就是我剛剛註冊的賬戶名和密碼 // 設置查詢條件 let where = { username, }; // 利用模型 let result = await UserModel.findOne(where) if(result != null){ // 根據用戶名查出來庫裏存儲的該用戶對應的密碼,判斷是否和當前用戶輸入的密碼同樣 if(result.password === password){ return done(null, result) }else{ return done(null, false, '密碼錯誤') } }else{ return done(null, false, '用戶不存在') } })) // 若是每次用戶進來的時候,都自動經過session去驗證 // passport提供的這兩個api是固定用法,是庫裏封裝好的api // 序列化:序列化指的是把用戶對象存到session裏 passport.serializeUser(function(user, done){ // 我查到用戶登陸驗證成功以後,會把用戶的數據存儲到session中 done(null, user); }) // 反序列化:從session裏取用戶數據成對象,session 多是存數據庫的或者寫文件裏的 passport.deserializeUser(function(user, done){ // 在每次請求的時候,會從session中讀取用戶對象 return done(null, user); }) // 登陸驗證成功了,我把數據打到cookies中,由於http通訊是沒有狀態的,session是存儲在cookies中,存在瀏覽器端,下次再進來的時候,我會從cookies中把你的session的信息提出來,和服務端的session作驗證對比,若是能找到的話,就說明這我的是登陸狀態,從而達到一個無狀態到有狀態的轉變 export default passport -
server/interface/utils/axios.js:
請求路徑,網頁等,具體能夠上網找關於axios相關知識點import axios from 'axios' const instance = axios.create({ //{process.penv.HOST||'localhost'}:判斷當前環境變量的主機,若是host沒有設置的話,默認取本機 //{process.env.POST||3000}:判斷端口,若是沒有的話,設置爲3000 baseURL: `http://${process.env.HOST||'localhost'}:${process.env.PORT||3000}`, // 設置超時 timeout:2000, headers:{ } }) export default instance
-
-
簡要接口介紹,具體見代碼:server/interface/users.js
- 接口
/users/signup           註冊接口
/users/signin           登錄接口
/users/verify           發送驗證碼接口
/users/exit             退出
/users/getUser          登錄狀態獲取用戶名
-
在server/index.js中引入路由:
import users from './interface/users'
app.use(users.routes()).use(users.allowedMethods())
-
將axios和passport和users接口在server/index.js中引入
1. 引入: import mongoose from 'mongoose' // 處理和post相關的請求的包 import bodyParser from 'koa-bodyparser' // 操做session的包 import session from 'koa-generic-session' import Redis from 'koa-redis' ... ... 2. 註冊: app.use(session({ key : 'mt', prefix: 'mt:uid', store: new Redis() })) // 擴展類型的配置 app.use(bodyParser({ extendTypes: ['json', 'form' , 'text'] })) // passport相關配置 app.use(passport.initialize()) app.use(passport.session()) ... ... -
在上述後臺配置結束後,在pages/register組件中定義方法,實現註冊邏輯
-
發送驗證碼:sendMsg
1. 先驗證用戶名,密碼是否符合規則
2. 若是符合規則,將用戶輸入的用戶名(username)和密碼(email)做爲參數,請求/users/verify接口
-
註冊:register
1. 判斷全部校驗邏輯是否正確
2. 將用戶輸入的:username, password, email, code做爲參數,請求接口/users/signup
3. 注意:將password利用crypto-js插件進行加密後再傳入,
    password: CryptoJS.MD5(self.ruleForm.pwd).toString(),
4. 註冊成功,跳轉到登陸頁面
    location.href = '/login'
5. 注意:定時將錯誤信息清空,不然會給用戶帶來誤導
    setTimeout(function(){
        self.error = '';
-
-
實現登陸邏輯pages/login.vue
-
登陸login方法:
1. 將登陸頁面用戶輸入的username和password做爲參數,請求接口/users/signin 2. 一樣,密碼須要加密 self.$axios.post('/users/signin', { username : window.encodeURIComponent(self.username), password : CryptoJS.MD5(self.password).toString() }) 3. 請求成功跳轉到主頁面 location.href="/" -
跳轉到主頁面後,實現 左上角"當即登陸" -> "用戶名"
users/components/public/header/user.vue1. 咱們已經定義了接口/users/getUser,經過請求這個接口就能獲取到用戶的用戶名 2. 可是咱們用何時請求接口呢,有兩種方式: (1) 在vuex中同步這種狀態, (2) 不增長SSR負擔,在組件中頁面渲染完畢以後 咱們再去獲取接口,咱們這裏用異步獲取 在mounted生命週期:組件掛載到頁面,渲染完畢再去請求,達到異步獲取的效果
-
-
退出邏輯pages/exit.vue
利用中間件

問:退出(exit.vue)組件中,爲何用中間件來實現退出操做呢,
    答: 由於,咱們點擊users/components/public/header/user.vue文件中的退出後
        跳轉到 退出頁面(page/exit.vue)以後,自動的去執行退出操做
        因此利用middleware機制,觸發這個獲取退出的接口,讓這個接口響應完以後,
        咱們再作自動化的執行動做
    ```
- 補充:開啓SMTP服務
關於數據
-
獲取數據獲取有兩種方式:
-
數據庫:
-
數據庫數據的導入
1. 進入到mongodb數據庫安裝位置
2. 執行:mongoimport d student -c areas areas.dat
舉個栗子:使用數據庫中的數據
-
-
server/interface/geo.js:
            import City from '../dbs/models/city'
            router.get('/province', async(ctx) =>{
                let province = await Province.find()
                ctx.body = {
                    province: province.map(item =>{
                        return {
                            id: item.id,
                            name: item.value[0]
                        }
                    })
                }
            })
        city.js
            import mongoose from 'mongoose'
            const Schema = mongoose.Schema
            const City = new Schema({
              id: {
                type: String,
                require: true
              },
              value: {
                type: Array,
                require: true
              }
            })
            export default mongoose.model('City', City)

        ```
+ 經過別人的接口獲取全部城市數據
    - 接口:
        ```
        http://cp-tools.cn/sign
        sign = 7296092/4224626
        ```
    - 舉個栗子
        ```
        import axios from './utils/axios'
        const sign = '3e59babc3d4d2e7bc9a5b4fe302d574e'
        router.get('/province', async(ctx) =>{
            let {status, data: {province}} = await axios.get(`http://cp-tools.cn/geo/province?sign=${sign}`)
            ctx.body = {
                province:  status === 200 ? province : []
            }
        })
        ```
+ 咱們這裏全部數據獲取都主要用接口的方式,能夠本身練習一下數據庫的方式
城市服務等:接口設計,顯示當前城市邏輯等
-
簡要接口介紹,具體見代碼:server/interface/geo.js
-
簡要接口介紹:
/geo/getPosition       在接口發出請求到服務端,服務端根據當前的ip來查庫,給出你當前城市的名稱
/geo/province          獲取省份的接口
/geo/province/:id      給出你指定的id的省份,每個省份都有一個對應的id,根據id能夠查詢到這個省份下面全部管轄的城市
/geo/city              獲取全部城市(不是按省份分類的城市)
/geo/hotCity           獲取熱門城市
/geo/menu              獲取所有分類下的菜單數據
接口測試工具:postman
-
在server/index.js中引入路由
import geo from './interface/geo'
app.use(geo.routes()).use(geo.allowedMethods())
-
如何將接口反映到城市上去
兩種辦法:
(1)直接在組件中請求接口,經過異步的方式,而後更改dom
(2)用SSR方式,在服務端渲染的時候,拿到接口的值,返回頁面,用戶體驗更高,由於過來的時候已經帶來告終果
-
-
獲取當前城市,經過SSR方式渲染在初始頁面的左上角:
-
建立文件:
store modules -->vuex子模塊 geo.js -->當前城市 index.js -->vuex模塊(彙總子模塊而且定義一些操做) -
邏輯
1. 在store/modules/geo.js中定義 改變位置的actions和mutations ->setPosition
2. 在store/index.js中引入geo.js
3. store/index.js中請求接口/geo/getPosition  --->  獲得當前位置
4. 將獲得的位置提交到vuex
5. components/public/header/geo.vue下使用數據
-
-
獲取所有分類下的子類,經過SSR方式渲染到components/index/menu.vue
建立文件:

store
        modules                     -->vuex子模塊
            geo.js                  -->當前城市
            home.js                 -->所有分類下的子類,和熱門城市
        index.js                    -->vuex模塊(彙總子模塊而且定義一些操做)
    ```
+ 邏輯
    ```
    1. 在store/modules/home.js中定義 actions和mutations
        setMenu         主頁左邊所有分類的子類
    2. 在store/index.js中引入home.js
    3. store/index.js中 請求接口/geo/menu  --->  獲得全部子類
    4. 將獲得的子類數據 提交到vuex
    5. components/index/menu.vue下使用數據
         上面dom數據渲染改成:(item, index) in $store.state.home.menu
         下面計算屬性curdetail改成
            let res = this.$store.state.home.menu.filter(item => item.type === this.kind)[0]
    ```
-
其餘須要瞭解知識點
- vuex
- Nuxt工做流部分的nuxtServerInit
- 項目總結:
https://www.cnblogs.com/jielin/p/10258316.html - 慕課實戰問答網址:
https://coding.m.imooc.com/questiondetail.html?qid=101986
(經過更改qid後面的內容查看問答) -
關於axios.get,axios.post,router.get/post
axios.get:          請求頁面獲取數據
axios.post:         經過傳遞參數,請求頁面獲取數據的
router.get/post:    對於請求這個路由的瀏覽器,服務端返回給瀏覽器的數據
- 如何判斷SSR效果是否是正確:經過查看源碼,由於這個是服務端打回給本身的模板
搜索相關:接口,搜索邏輯等
-
簡要接口介紹,具體見代碼:server/interface/search.js
-
接口
/search/top
/search/resultsByKeysWords      根據任何一個關鍵詞能夠查出來全部相關的列表
/search/hotPlace                熱門景點/熱門搜索
/search/products                查詢列表,咱們點擊某一個關鍵詞並進入後,它會在產品列表頁推薦全部的產品
/search/products/:id            根據每一個產品的id查詢這個產品的詳情
-
在server/index.js中引入路由
import geo from './interface/geo'
app.use(geo.routes()).use(geo.allowedMethods())
-
-
搜索:經過調用接口直接返回數據
-
注意:每輸入一個字母都進行一次請求,顯然浪費性能,因此引入lodash插件
import _ from 'lodash' // 只有在最後一次點擊的300ms後,真正的函數func纔會觸發。 input: _.debounce(async function(){ let self = this; // 將後面的那個市字去掉, 由於第三方服務的限制,帶着這個字就查不到 let city = self.$store.state.geo.position.city.replace('市', ''); self.searchList = []; let {status, data:{top}} = await self.$axios.get('/search/top', { params: { input : self.search, city } }) // 數據截取十條 self.searchList = top.slice(0, 10) }, 300) - lodash詳解:
https://segmentfault.com/a/1190000015312430 -
問題:Error: timeout of 1000ms exceeded
在axios.js配置文件中timeout改成2000
-
-
熱門城市推薦,經過SSR方式渲染到components/public/header/searchbar.vue
-
定義 獲取數據接口:server/interface/search.js
router.get('/hotPlace', async (ctx)=>{ let city = ctx.store?ctx.store.geo.position.city: ctx.query.city; let {status, data:{result}} = await axios.get(`http://cp-tools.cn/search/hotPlace`, { params: { sign, // 服務端沒有作編碼的要求,因此這裏咱們不用編碼 city: city, } }) ctx.body = { result: status === 200? result : [] } }) -
將熱門城市數據存到vuex中
-
建立文件:
store modules -->vuex子模塊 geo.js -->當前城市 home.js -->所有分類下的子類,和熱門城市 index.js -->vuex模塊(彙總子模塊而且定義一些操做) -
存儲步驟:
1. 在store/modules/home.js中定義 actions和mutations
    setHotPlace         熱門推薦
2. 在store/index.js中引入home.js
3. store/index.js中 請求接口/search/hotPlace  --->  獲得全部熱門城市
-
-
用vuex中的數據從新渲染searchbar.vue中的熱門推薦
1. 第一個改動:
    <dt>熱門搜索</dt>
    <dd v-for="(item, index) in $store.state.home.hotPlace.slice(0, 5)" :key="index">
        <a :href="'/products?keyword='+encodeURIComponent(item.name)">{{item.name}}</a>
    </dd>
2. 第二個改動:
    <p class="suggest">
        <a :href="'/products?keyword='+encodeURIComponent(item.name)" v-for="(item, index) in $store.state.home.hotPlace.slice(0, 5)" :key="index">{{item.name}}</a>
-
-
有格調部分components/index/artistic.vue,直接經過接口獲取數據並渲染
- 接口:server/interface/search.js:/search/resultsByKeysWords
-
渲染:
1. 鼠標劃過觸發over事件
    over事件:
        1) 獲得鼠標劃過當前元素的kind值和keyword值
        2) 把keyword和city(從vuex中取)做爲參數傳到/search/resultsByKeywords中獲取數據
        3) 將獲得的數據作一個過濾,必須有圖片的才能顯示
        4) 將獲得的數據再作一個格式化,獲得咱們渲染dom須要的格式
2. 設置一個默認顯示:
    由於這個over事件是鼠標滑動才執行的
    也就是若是我初始化頁面,鼠標沒有滑動,那麼此時什麼都不顯示
    這不是咱們所指望的
  解決:在mounted中就發送一次請求,讓頁面顯示數據
#### 城市選擇頁面:changeCity
-
位置、引入
- 位置:pages/changeCity.vue
- 訪問:localhost:3000/changeCity
- 模板:使用默認default.vue模板
changeCity中組件

components:{
        iSelect,
        Hot,
        Categroy
    }
    ```
+ 這個頁面的難點
    - 拼音首字母怎麼寫,若是寫26個英文字母標籤再插入,是很失敗的
    - 如何經過後端給定接口,返回城市後,根據字母來分類
        + 一個字母對應城市的顯示
        + 點擊字母,快速定位到該字母對應的全部城市
按省份選擇iselect.vue 那欄

-
位置、引入:
- 位置:components/changeCity/iselect.vue
- 在pages/changeCity.vue中被引入
-
邏輯:
- 搜索框參見Elmement-UI:
https://element.eleme.cn/#/zh-CN/component/input - 肯定須要哪些數據province,city.....
-
將省份和城市作關聯(利用watch監聽屬性),根據省份獲取城市(利用axios)
省份: <el-select v-model="pvalue" placeholder="請選擇"> 城市: <el-select v-model="cvalue" placeholder="請選擇" :disabled="!city.length"> 聯繫: 根據pvalue找到該省的全部城市,城市結構的顯示 依賴於該省全部城市的長度 這樣就實現了城市和省份相關聯 watch:{ pvalue: async function(newPvalue){ let self = this; let {status, data:{city}} = await self.$axios.get(`geo/province/${newPvalue}`); if(status == 200){ self.city = city.map(item =>{ return { value:item.id, label:item.name, } }) // 切換省份以後,將上一次選擇的城市的值清空 self.cvalue=''; } } } -
在頁面被加載以前將全部省份獲取過來,(mounted時候,axios請求數據)
mounted: async function(){ let self = this; let {status, data:{province}} = await self.$axios.get(`geo/province`); self.province = province.map(item =>{ return { value: item.id, label: item.name } }) }, -
直接搜索部分,數據的處理,利用延時處理lodash的debounce函數
DOM結構:
    <el-autocomplete
        v-model="input"
        :fetch-suggestions="querySearchAsync"
        placeholder="請輸入城市中文名或拼音"
        @select="handleSelect"
    ></el-autocomplete>
引入lodash:import _ from 'lodash'
兩個事件:
    fetch-suggestions="querySearchAsync"  -> 用戶輸入內容的時候觸發的事件
    @select="handleSelect"                -> 當列表被點擊選中的時候,觸發這個方法

    querySearchAsync:_.debounce(async function(query, cb){
        1. 若是cities有值的話,直接在cities裏面搜索
        2. 若是citie沒有值的話,從geo/city接口獲取數據
        3. 將獲取到的數據格式化,咱們只須要value值
- 搜索框參見Elmement-UI:
}, 200),
        handleSelect:function(item){
            1. 將當前城市設置爲item
            2. 跳轉頁面,回到初始頁
        }
    ```
+ 注意:直接搜索 範圍是全國
熱門城市hot.vue 那欄

-
位置、引入:
- 位置:components/changeCity/hot.vue
- 在pages/changeCity.vue中被引入
-
邏輯:
- 結構採用dl dt dd,由於是一個標題,不少內容
-
在mounted聲明周期函數中獲取數據渲染
async mounted(){
    let {status, data:{hots}} = await this.$axios.get(`/geo/hotCity`)
    if(status == 200){
        this.list = hots;
    }
}
按拼音首字母選擇categroy.vue 那欄

-
位置、引入:
- 位置:components/changeCity/categroy.vue
- 在pages/changeCity.vue中被引入
-
邏輯:
-
肯定顯示字母用的節點,利用dl dt dd,舉個栗子:
<dl class="m-categroy"> <dt>按拼音首字母選擇</dt> <dd v-for="item in list" :key="item"> <!-- 由於點擊字母要實現跳轉,因此要用連接 --> <a :href="'#city-'+item">{{item}}</a> </dd> </dl> -
點擊字母,快速定位到該字母對應的全部城市->利用a標籤的#,以下
遍歷字母: <dl class="m-categroy"> <dt>按拼音首字母選擇</dt> <dd v-for="item in list" :key="item"> <!-- 由於點擊字母要實現跳轉,因此要用連接 --> <a :href="'#city-'+item">{{item}}</a> </dd> </dl> 遍歷每一個字母對應的城市: <dl v-for="item in block" :key="item.title" class="m-categroy-section"> <dt :id="'city-'+item.title">{{item.title}}</dt> <dd> <span v-for="c in item.city" :key="c">{{ c }}</span> </dd> </dl> 上面的href和下面的id實現定位 -
左側字母,右側城市部分,選擇合適的數據格式,有利於dom結點的減小
data(){ return{ list:'ABCDEFGHIJKLMNOPQRSTUVWXYZ'.split(''), // block用來存儲 後面用字母 分類城市部分數據,title表明字母,city表明該字母對應城市 // block:[title, city:[]] block:[], } }, -
全部城市獲取利用接口/geo/city
let {status, data:{city}} = await self.$axios.get('/geo/city'); -
將每一個字母對應的城市選擇出來, 將數據改成須要的格式,將字母連帶着城市進行排序顯示
-
漢語和拼音的轉化:利用庫
1. 引入:
    import pyjs from 'js-pinyin'
將字母對應城市選擇出來
-
-
city.forEach(item => {
            // pyjs.getFullChars->拼音這個庫本身自己的api,拿到這個參數的拼音全拼
            // toLocaleLowerCase().slice(0, 1) ->轉小寫,而後拿到首字母
            p = pyjs.getFullChars(item.name).toLocaleLowerCase().slice(0, 1);
            // 拿到p的unicode值
            c = p.charCodeAt(0);
            // 若是沒有這個字母的話,就建立一個新的
            if(!d[p]){
                d[p] = [];
            }
            d[p].push(item.name);
        })
        ```
    - 將獲得的數據由對象格式變爲數組
        ```
        for(let [k, v] of Object.entries(d)){
            // 這個k和v就是[key, value]
            // for of 上網查
            blocks.push({
                title: k.toUpperCase(),
                city: v,
            })
        }
        ```
    - 將字母排序顯示
        ```
        blocks.sort((a, b)=>a.title.charCodeAt(0) - b.title.charCodeAt(0))
        self.block = blocks;
        ```
產品列表頁(products),就是點擊搜索出來的頁面:products

-
位置、引入
- 位置:pages/products.vue中被引入
- 訪問:localhost:3000/products
- 模板:使用默認default.vue模板
-
products中組件
components:{
    Crumbs,         ->哈爾濱美團哈爾濱哈爾濱融創樂園
    Categroy,       ->分類,區域的部分
    List,           -> 智能排序,景點詳情部分
    Amap            ->地圖
}
-
邏輯:pages/products.vue
-
經過SSR方式拿數據,舉個栗子:
async asyncData(ctx){ let keyword = ctx.query.keyword; let city = ctx.store.state.geo.position.city.replace('市','') || "哈爾濱"; // count:一共多少條數據 // pois:數據 let {status,data:{count,pois}} = await ctx.$axios.get('/search/resultsByKeywords',{ params:{ keyword, city, } }) } -
將獲取到的數據進行
- 過濾:有圖片的數據
- 格式化:只取咱們須要的數據,並格式化成咱們須要的數據格式
-
沒有通往這個頁面的入口,就是能觸發 訪問localhost:3000/products 操做的地方
在components/public/header/searchbar.vue中更改兩個熱門搜索,一個搜索列表,添加 相似以下語句 <a :href="'/products?keyword='+encodeURIComponent(item.name)">{{item.name}}</a> -
待實現功能:
- 點擊排序:點擊按價格排序或者按人氣排序能夠實現下面列表的排序
- 鼠標劃過景點簡介時候,地圖能夠定位到相應位置
-
- 注意decode和encode的問題:query的不少插件在源碼中進行了decode,因此用的時候,有的已decode了,本身就不必再寫一遍了,會報錯
哈爾濱美團哈爾濱哈爾濱融創樂園:Crumbs

-
位置、引入
- 位置:components/products/crumbs.vue
- 在pages/products.vue中被引入
-
邏輯:
- DOM結構,參見Element-UI:
https://element.eleme.cn/#/zh-CN/component/breadcrumb -
數據:vuex中取數據
{{ $store.state.geo.position.city.replace('市','') }}美團
{{ $store.state.geo.position.city.replace('市','') }}{{ decodeURIComponent(keyword) }}
- DOM結構,參見Element-UI:
分類,區域的部分:categroy

-
位置、引入
- 位置:components/products/categroy.vue
- 在pages/products.vue中被引入
-
categroy中組件
components:{
    iselect        ->下拉框(劃過酒店住宿,周邊游出現的下拉框)
}
-
邏輯:
-
DOM結構:
- 利用dl裏面兩個dt(分類和所有)和一個dd,dd裏面循環引入組件iselect.vue,展現分類右邊的數據,像什麼酒店住宿,周邊遊之類的
- 將每一項都用一個公共的組件iselect.vue來實現,經過組件中數據的改變來實現頁面的佈局
<dl class="classic"> <dt>分類</dt> <dt>所有</dt> <dd v-for="(item,idx) in types" :key="idx"> <-- 下拉框(劃過酒店住宿,周邊游出現的下拉框) --> <iselect :name="item.type" :list="item.module"/> </dd> </dl> -
下拉框 components/products/iselect.vue
-
DOM結構:舉個栗子:酒店住宿
<dl class="tab">
  <!-- dt:酒店住宿 -->
  <dt>{{ name }}<i class="el-icon-arrow-down el-icon--right"/></dt>
  <dd>
    <!-- h3:酒店住宿 -->
    <h3>{{ name }}</h3>
    <!-- span:所有 公寓民宿 多人出行 -->
    <span
      v-for="(item,idx) in list"
      :key="idx">{{ item }}</span>
  </dd>
</dl>
-
-

智能排序,景點詳情部分:list

-
位置、引入
- 位置:components/products/list.vue
- 在pages/products.vue中被引入
-
list中組件
import Item from './product.vue'
components:{
    Item            ->每一個景點的簡要介紹:像幾顆星,門票價格,位置等
}
-
邏輯:
-
DOM結構
- 採用dl和dd,將智能排序,價格排序,人氣等放在一個數組中,利用v-for循環輸出數據
-
每一個景點的信息利用組件(item)循環輸出,每一個item包括圖片,描述等信息
1. 智能排序 價格排序 人氣最高 評價最高
    <dd
    v-for="item in nav"
    :key="item.name"
    :class="[item.name,item.acitve?'s-nav-active':'']"
    @click="navSelect"
  >{{ item.txt }}</dd>
2. 景點的簡要介紹:Item(import Item from './product.vue')
    <Item
    v-for="(item,idx) in list"
    :key="idx"
+ 景點的簡要介紹:components/products/product.vue  - DOM結構:參見Element-UI: `https://element.eleme.cn/#/zh-CN/component/rate` - 數據:父組件傳遞 #### 地圖控件Amap -
-
位置、引入
- 位置:components/public/map.vue
- 在pages/products.vue中被引入
-
https://lbs.amap.com/api/javascript-api/guide/overlays/toolbar詳情頁開發 detail.vue
- 需求分析
-
位置、引入
- 位置:pages/detail.vue
- 訪問 localhost:3000/detail.vue
- 模板:使用默認default.vue模板
detail.vue中組件


components:{
        Crumbs,         ->哈爾濱美團 > 哈爾濱美食 > 哈爾濱火鍋
        Summa,          ->商品詳情
        List            ->商家團購及優惠下的列表
    }
    ```
+ 跳轉到該路由的連接:components/products/product.vue
    ```
    <h3><nuxt-link :to="{path:'detail',query:{keyword:meta.name,type:meta.module}}">{{ meta.name }}</nuxt-link></h3>
    ```
-
邏輯:
-
判斷是否顯示:商家團購及優惠,顯示的條件是登陸或者有數據,利用v-if實現
<el-row v-if="canOrder || !login"> <el-col :span="24"> <!-- 下面這兩個list和div是平行結構,只能有一個顯示 --> <!-- 若是登陸顯示list組件 --> <list v-if="login" :list="list"/> <!-- 若是沒登陸,顯示未登陸 --> <div v-else></div> </el-col> </el-row> -
思考:訪問(詳情頁)localhost:3000/detail.vue時的請求參數:keyword,type,
爲何不在data中獲取,而是asyncData中
在訪問localhost:3000/detail.vue時的請求參數keyword,type 只能經過:let {keyword,type}=ctx.query,在服務器端獲取到 而asyncData中正好是在服務器端執行的, 因此寫在asyncData中 代碼見:pages/detail.vue中 -
在detail.vue中請求/search/products後
(請求回來的數據傳遞路線: detail.vue->list.vue->item.vue)
返回數據格式以下緣由:和data關聯,因此,返回數據後,data就不用一樣再寫一次了return { keyword, product, type, list, login }
-
商家團購及優惠下的列表 List

-
位置、引入
- 位置:components/details/list.vue
- 在pages/detail.vue中被引入
-
list.vue中的組件
components:{
    item        ->每條數據
}
-
邏輯:
-
DOM結構:
<ul> <li>{{ list.filter(item=>item.photos.length).length }}款套餐</li> <item v-for="(item,idx) in list" :key="idx" :meta="item" /> </ul> -
數據的獲取:兩種方式
-
SSR:我在頁面下發的時候就把數據塞進去了
- SSR方式,用戶體驗好,用戶直接拿到信息,
- 連 接口都保護起來了,好比說我建立購物車接口,我根本就暴露不出來,由於這個動做是在服務端執行的,客戶端看不到建立購物車
- 拿到空頁面以後額外請求數據
-
-
item組件(components/details/item.vue)
-
用於渲染DOM結構的數據獲取:
pages/detail.vue請求接口/search/products
將數據傳遞給components/details/list.vue
list.vue將數據傳遞給item組件
-
點擊搶購商品,建立購物車
1. 請求接口/cart/create:建立購物車,將剛建立的購物車id返回
2. 建立成功後,根據購物車id跳轉到購物車頁面->pages/cart.vue
3. 補充: 實際應用中,瀏覽器傳給服務端一個產品的id
        而後這個id對應產品庫中的某個商品
        而後再將該商品的名稱,價錢等信息傳給服務端,
        可是咱們這裏沒有真正的產品庫,因此
        只能經過 直接傳給服務端商品的名稱,價錢等信息
        來獲取服務器端對應的數據 這樣的方式
建立購物車接口::server/interface/cart.js->/cart/create
-
-

接口實現功能:
            1. 登陸驗證
            2. 將購物車信息存入數據庫中
            3. 將建立好的購物車id返回給客戶端
        註冊路由,讓路由生效
            server/index.js中:
                import cart from './interface/cart'
                app.use(cart.routes()).use(cart.allowedMethods())
        ```
購物車:cart

-
位置、引入
- 位置:pages/cart.vue
- 訪問 localhost:3000/cart.vue
- 模板:使用默認default.vue模板
-
cart.vue中組件
components:{ list ->訂單列表 } -
跳轉到該路由的連接:components/details/item.vue
window.location.href=`/cart/?id=${id}`
-
邏輯
-
DOM結構:設計一個平行結構,考慮購物車爲空和不爲空的兩種狀況
<el-row class="page-cart"> <!-- 購物車不爲空的時候 --> <el-col v-if="cart.length" :span="24" class="m-cart"> ... ... <list :cart-data="cart"/> ... ... </el-col> <!-- 購物車爲空的時候 --> <el-col v-else class="empty">購物車爲空</el-col> </el-row> - 訂單列表list.vue(components/cart/list.vue)
-

- DOM結構:參見Element-UI:
`https://element.eleme.cn/#/zh-CN/component/table`
- 數據:
```
父組件pages/cart.vue經過SSR獲取數據(經過這個接口:/cart/getCart)
傳給子組件list.vue 全部訂單數據,由子組件所有渲染出來
```
- 邏輯:
```
父組件經過接口獲取數據,傳入子組件數組,存儲在cartData中,
子組件經過Element-UI結構渲染數據,
若是我在子組件中更改了購買商品的數量,也就是cartData中的值被更改了,
那麼,咱們在父組件監聽的total(全部訂單總價),也就會從新計算
而後從新渲染父組件中 下面這個結構中的數據
<p>
應付金額:<em class="money">¥{{ total }}</em>
</p>
```
- 注意:仔細看一下list.vue的數據計算和DOM結構!有一部分須要好好理解
+ 提交訂單:點擊"提交訂單",請求/order/createOrder接口,若是請求成功,跳轉頁面至所有訂單頁
所有訂單頁:order

- 需求分析

-
位置、引入
- 位置:pages/order.vue
- 訪問 localhost:3000/order.vue
- 模板:使用默認default.vue模板
-
detail.vue中組件
components:{ List ->訂單列表 } -
跳轉到該路由的連接:pages/cart.vue
this.$alert(`恭喜您,已成功下單,訂單號:${id}`, '下單成功', { confirmButtonText: '肯定', callback: action => { location.href = '/order' } }) } -
建立訂單和返回所有訂單接口:server/interface/order.js
/order/createOrder接口實現功能:
    1. 根據請求接口的參數的:id(購物車id), price, count加上一些其餘參數建立訂單
/order/getOrders返回數據庫中所有訂單
    最後:註冊路由,讓路由生效
        server/index.js中:
            import order from './interface/order'
            app.use(order.routes()).use(order.allowedMethods())
    ```
-
邏輯
- DOM結構:參見Element-UI:
https://element.eleme.cn/#/zh-CN/component/tabs -
獲取所有訂單,經過SSR方式渲染到pages/order中的list組件(components/order/list.vue)
- 從接口/order/getOrders獲取所有訂單數據
- 將數據格式化爲 咱們渲染頁面想要的格式
async asyncData(ctx) { const { status, data: { code, list }} = await ctx.$axios.post('/order/getOrders') if (status === 200 && code === 0 && list.length) { return { // 將後端返回數據和前端數據進行映射 list: list.map(item => { return { img: item.imgs.length ? item.imgs[0].url : 'https://i.loli.net/2019/01/10/5c3767c4a52de.png', name: item.name, count: 1, total: item.total, status: item.status, statusText: item.status === 0 ? '待付款' : '已付款' } }), } } } -
點擊"所有訂單"或者"待付款"或者"待使用"等,樣式和數據對應改變
點擊元素,觸發handleClick事件
    handleClick(tab) {
      this.activeName = tab.name
    }
監聽activeName,若是改變,則改變數據
    activeName(val) {
      //cur就是傳遞給當前應該顯示的數據,默認是所有
      this.cur = this.list.filter(item => {
        if (val === 'unpay') {
          return item.status === 0
        } else if (val === 'all') {
          return true
        } else {
          return false
        }
      })
    },
- DOM結構:參見Element-UI:
問題
- 搜索失去焦點,熱門推薦還在
- 還有莫名其妙會報錯,會出現什麼靚麗什麼的搜索結果
- 註冊時候同一個驗證碼也能夠註冊
- 1. 實戰:Vue全家桶+SSR+Koa2實現美團網
- 2. Vue全家桶+SSR+Koa2全棧開發美團網③——mongoose基礎
- 3. Vue全家桶+SSR+Koa2全棧開發美團網
- 4. Vue全家桶+SSR+Koa2全棧開發美團網 筆記
- 5. Vue全家桶+SSR+Koa2全棧開發美團網【筆記】
- 6. Vue全家桶+SSR+Koa2全棧開發美團網筆記
- 7. Vue全家桶+SSR+Koa2+MongoDB全棧開發仿美團網
- 8. Vue全家桶
- 9. vue全家桶
- 10. Vue 全家桶
- 更多相關文章...
- • 現實生活中的 XML - XML 教程
- • Hibernate實現增刪改查 - Hibernate教程
- • ☆基於Java Instrument的Agent實現
- • Spring Cloud 微服務實戰(三) - 服務註冊與發現
-
每一个你不满意的现在,都有一个你没有努力的曾经。
- 1. 升級Gradle後報錯Gradle‘s dependency cache may be corrupt (this sometimes occurs
- 2. Smarter, Not Harder
- 3. mac-2019-react-native 本地環境搭建(xcode-11.1和android studio3.5.2中Genymotion2.12.1 和VirtualBox-5.2.34 )
- 4. 查看文件中關鍵字前後幾行的內容
- 5. XXE萌新進階全攻略
- 6. Installation failed due to: ‘Connection refused: connect‘安卓studio端口占用
- 7. zabbix5.0通過agent監控winserve12
- 8. IT行業UI前景、潛力如何?
- 9. Mac Swig 3.0.12 安裝
- 10. Windows上FreeRDP-WebConnect是一個開源HTML5代理,它提供對使用RDP的任何Windows服務器和工作站的Web訪問