基於Spring Security Oauth2的SSO單點登陸+JWT權限控制實踐
概 述
在前文《基於Spring Security和 JWT的權限系統設計》之中已經討論過基於 Spring Security和 JWT的權限系統用法和實踐,本文則進一步實踐一下基於 Spring Security Oauth2實現的多系統單點登陸(SSO)和 JWT權限控制功能,畢竟這個需求也仍是蠻廣泛的。html
代碼已開源,放在文尾,須要自取git
理論知識
在此以前須要學習和了解一些前置知識包括:github
- Spring Security:基於
Spring實現的Web系統的認證和權限模塊 - OAuth2:一個關於受權(
authorization)的開放網絡標準 - 單點登陸 (SSO):在多個應用系統中,用戶只須要登陸一次就能夠訪問全部相互信任的應用系統
- JWT:在網絡應用間傳遞信息的一種基於
JSON的開放標準((RFC 7519),用於做爲JSON對象在不一樣系統之間進行安全地信息傳輸。主要使用場景通常是用來在 身份提供者和服務提供者間傳遞被認證的用戶身份信息
要完成的目標
- 目標1:設計並實現一個第三方受權中心服務(
Server),用於完成用戶登陸,認證和權限處理 - 目標2:能夠在受權中心下掛載任意多個客戶端應用(
Client) - 目標3:當用戶訪問客戶端應用的安全頁面時,會重定向到受權中心進行身份驗證,認證完成後方可訪問客戶端應用的服務,且多個客戶端應用只須要登陸一次便可(謂之 「單點登陸
SSO」)
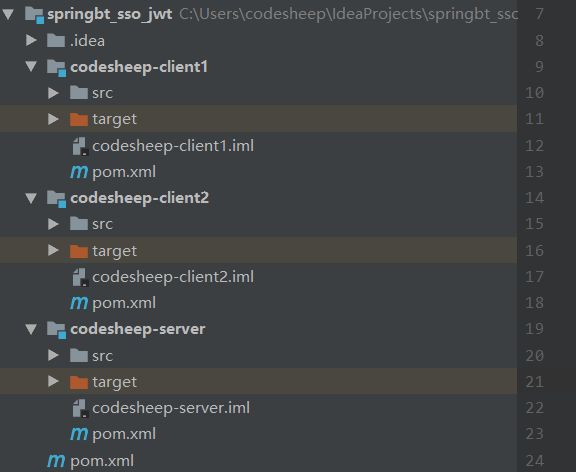
基於此目標驅動,本文設計三個獨立服務,分別是:spring
- 一個受權服務中心(
codesheep-server) - 客戶端應用1(
codesheep-client1) - 客戶端應用2(
codesheep-client2)
多模塊(Multi-Module)項目搭建
三個應用經過一個多模塊的 Maven項目進行組織,其中項目父 pom中須要加入相關依賴以下:數據庫
<dependencies>

	<dependency>
		<groupId>org.springframework.boot</groupId>
		<artifactId>spring-boot-dependencies</artifactId>
		<version>2.0.8.RELEASE</version>
		<type>pom</type>
		<scope>import</scope>
	</dependency>

	<dependency>
		<groupId>io.spring.platform</groupId>
		<artifactId>platform-bom</artifactId>
		<version>Cairo-RELEASE</version>
		<type>pom</type>
		<scope>import</scope>
	</dependency>

	<dependency>
		<groupId>org.springframework.cloud</groupId>
		<artifactId>spring-cloud-dependencies</artifactId>
		<version>Finchley.SR2</version>
		<type>pom</type>
		<scope>import</scope>
	</dependency>

</dependencies>
複製代碼
項目結構以下:瀏覽器
受權認證中心搭建
受權認證中心本質就是一個 Spring Boot應用,所以須要完成幾個大步驟:緩存
pom中添加依賴
<dependencies>
	<dependency>
		<groupId>org.springframework.cloud</groupId>
		<artifactId>spring-cloud-starter-oauth2</artifactId>
	</dependency>
</dependencies>
複製代碼
- 項目
yml配置文件:
server:
  port: 8085
  servlet:
    context-path: /uac
複製代碼
即讓受權中心服務啓動在本地的 8085端口之上安全
- 建立一個帶指定權限的模擬用戶
@Component
public class SheepUserDetailsService implements UserDetailsService {

    @Autowired
    private PasswordEncoder passwordEncoder;

    @Override
    public UserDetails loadUserByUsername(String s) throws UsernameNotFoundException {

        if( !"codesheep".equals(s) )
            throw new UsernameNotFoundException("用戶" + s + "不存在" );

        return new User( s, passwordEncoder.encode("123456"), AuthorityUtils.commaSeparatedStringToAuthorityList("ROLE_NORMAL,ROLE_MEDIUM"));
    }
}
複製代碼
這裏建立了一個用戶名爲codesheep,密碼 123456的模擬用戶,而且賦予了 普通權限(ROLE_NORMAL)和 中等權限(ROLE_MEDIUM)bash
- 認證服務器配置
AuthorizationServerConfig
@Configuration
@EnableAuthorizationServer
public class AuthorizationServerConfig extends AuthorizationServerConfigurerAdapter {

    @Override
    public void configure(ClientDetailsServiceConfigurer clients) throws Exception {

        // 定義了兩個客戶端應用的通行證
        clients.inMemory()
                .withClient("sheep1")
                .secret(new BCryptPasswordEncoder().encode("123456"))
                .authorizedGrantTypes("authorization_code", "refresh_token")
                .scopes("all")
                .autoApprove(false)
                .and()
                .withClient("sheep2")
                .secret(new BCryptPasswordEncoder().encode("123456"))
                .authorizedGrantTypes("authorization_code", "refresh_token")
                .scopes("all")
                .autoApprove(false);
    }

    @Override
    public void configure(AuthorizationServerEndpointsConfigurer endpoints) throws Exception {

        endpoints.tokenStore(jwtTokenStore()).accessTokenConverter(jwtAccessTokenConverter());
        DefaultTokenServices tokenServices = (DefaultTokenServices) endpoints.getDefaultAuthorizationServerTokenServices();
        tokenServices.setTokenStore(endpoints.getTokenStore());
        tokenServices.setSupportRefreshToken(true);
        tokenServices.setClientDetailsService(endpoints.getClientDetailsService());
        tokenServices.setTokenEnhancer(endpoints.getTokenEnhancer());
        tokenServices.setAccessTokenValiditySeconds((int) TimeUnit.DAYS.toSeconds(1)); // 一天有效期
        endpoints.tokenServices(tokenServices);
    }

    @Override
    public void configure(AuthorizationServerSecurityConfigurer security) throws Exception {
        security.tokenKeyAccess("isAuthenticated()");
    }

    @Bean
    public TokenStore jwtTokenStore() {
        return new JwtTokenStore(jwtAccessTokenConverter());
    }

    @Bean
    public JwtAccessTokenConverter jwtAccessTokenConverter(){
        JwtAccessTokenConverter converter = new JwtAccessTokenConverter();
        converter.setSigningKey("testKey");
        return converter;
    }

}
複製代碼
這裏作的最重要的兩件事:一是 定義了兩個客戶端應用的通行證(sheep1和sheep2);二是 配置 token的具體實現方式爲 JWT Token。服務器
- Spring Security安全配置
SpringSecurityConfig
@Configuration
public class SpringSecurityConfig extends WebSecurityConfigurerAdapter {

    @Override
    @Bean
    public AuthenticationManager authenticationManager() throws Exception {
        return super.authenticationManager();
    }

    @Autowired
    private UserDetailsService userDetailsService;

    @Bean
    public PasswordEncoder passwordEncoder() {
        return new BCryptPasswordEncoder();
    }

    @Bean
    public DaoAuthenticationProvider authenticationProvider() {
        DaoAuthenticationProvider authenticationProvider = new DaoAuthenticationProvider();
        authenticationProvider.setUserDetailsService(userDetailsService);
        authenticationProvider.setPasswordEncoder(passwordEncoder());
        authenticationProvider.setHideUserNotFoundExceptions(false);
        return authenticationProvider;
    }

    @Override
    protected void configure(HttpSecurity http) throws Exception {

        http
                .requestMatchers().antMatchers("/oauth/**","/login/**","/logout/**")
                .and()
                .authorizeRequests()
                .antMatchers("/oauth/**").authenticated()
                .and()
                .formLogin().permitAll();
    }

    @Override
    protected void configure(AuthenticationManagerBuilder auth) throws Exception {
        auth.authenticationProvider(authenticationProvider());
    }

}
複製代碼
客戶端應用建立和配置
本文建立兩個客戶端應用:codesheep-client1 和codesheep-client2,因爲二者相似,所以只以其一爲例進行講解
- SSO客戶端應用配置類
ClientWebsecurityConfigurer
@Configuration
@EnableWebSecurity
@EnableGlobalMethodSecurity(prePostEnabled = true)
@EnableOAuth2Sso
public class ClientWebsecurityConfigurer extends WebSecurityConfigurerAdapter {

    @Override
    public void configure(HttpSecurity http) throws Exception {
        http.antMatcher("/**").authorizeRequests()
                .anyRequest().authenticated();
    }
}
複製代碼
複雜的東西都交給註解了!
- application.yml配置
auth-server: http://localhost:8085/uac
server:
  port: 8086

security:
  oauth2:
    client:
      client-id: sheep1
      client-secret: 123456
      user-authorization-uri: ${auth-server}/oauth/authorize
      access-token-uri: ${auth-server}/oauth/token
    resource:
      jwt:
        key-uri: ${auth-server}/oauth/token_key
複製代碼
這裏幾項配置都很是重要,都是須要和前面搭建的受權中心進行通訊的
- 建立測試控制器
TestController
@RestController
public class TestController {

    @GetMapping("/normal")
    @PreAuthorize("hasAuthority('ROLE_NORMAL')")
    public String normal( ) {
        return "normal permission test success !!!";
    }

    @GetMapping("/medium")
    @PreAuthorize("hasAuthority('ROLE_MEDIUM')")
    public String medium() {
        return "medium permission test success !!!";
    }

    @GetMapping("/admin")
    @PreAuthorize("hasAuthority('ROLE_ADMIN')")
    public String admin() {
        return "admin permission test success !!!";
    }
}
複製代碼
此測試控制器包含三個接口,分別須要三種權限(ROLE_NORMAL、ROLE_MEDIUM、ROLE_ADMIN),待會後文會一一測試看效果
實驗驗證
- 啓動受權認證中心
codesheep-server(啓動於本地8085端口) - 啓動客戶端應用
codesheep-client1(啓動於本地8086端口) - 啓動客戶端應用
codesheep-client2(啓動於本地8087端口)
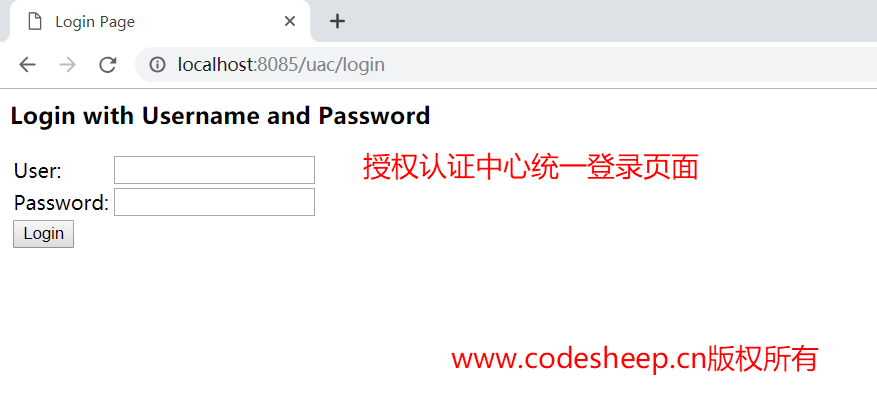
首先用瀏覽器訪問客戶端1 (codesheep-client1) 的測試接口:localhost:8086/normal,因爲此時並無過用戶登陸認證,所以會自動跳轉到受權中心的登陸認證頁面:http://localhost:8085/uac/login:
輸入用戶名 codesheep,密碼 123456,便可登陸認證,並進入受權頁面:
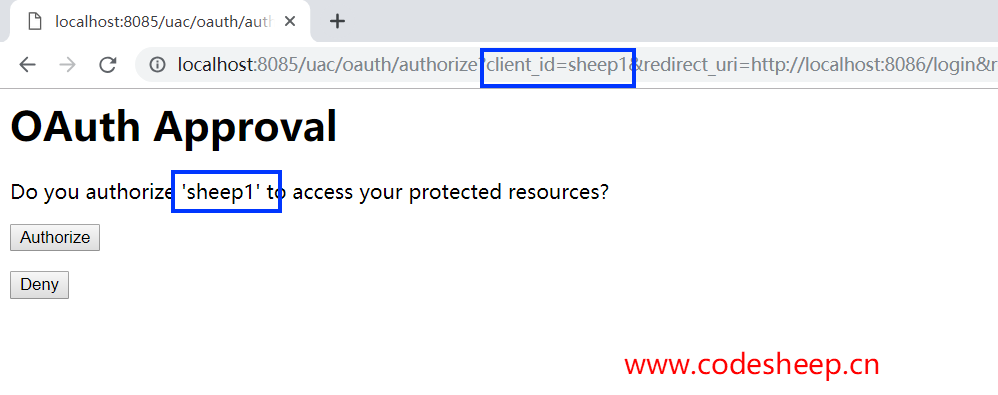
贊成受權後,會自動返回以前客戶端的測試接口:
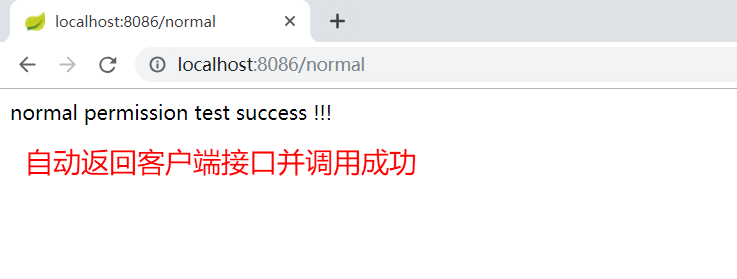
此時咱們再繼續訪問客戶端1 (codesheep-client1) 的測試接口:localhost:8086/medium,發現已經直接能夠調用而無需認證了:
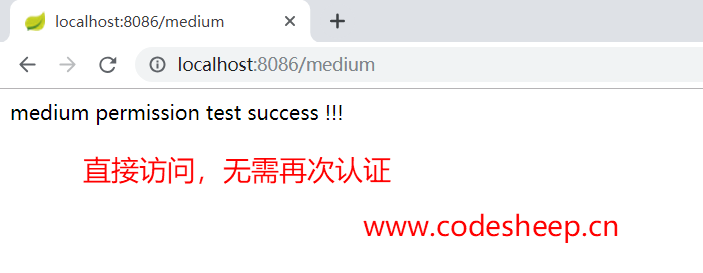
因爲 localhost:8086/normal 和 localhost:8086/medium要求的接口權限,用戶codesheep均具有,因此能順利訪問,接下來再訪問一下更高權限的接口:localhost:8086/admin:
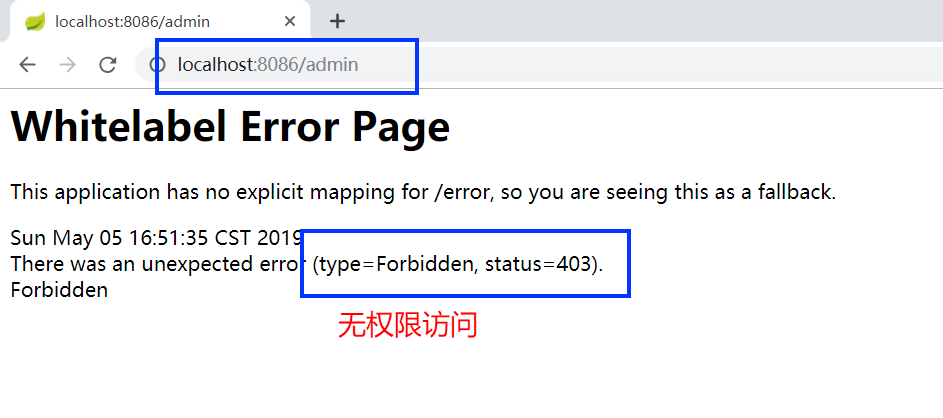
好了,訪問客戶端1 (codesheep-client1) 的測試接口到此爲止,接下來訪問外掛的客戶端2 (codesheep-client2) 的測試接口:localhost:8087/normal,會發現此時會自動跳到受權頁:
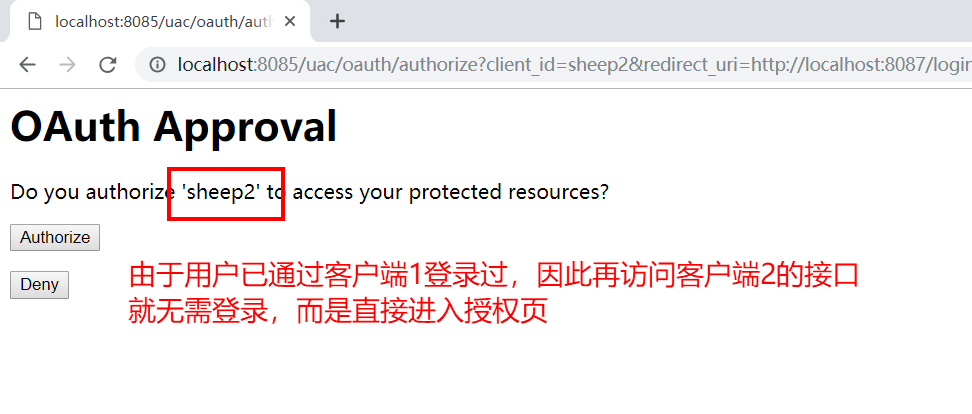
受權完成以後就能夠順利訪問客戶端2 (codesheep-client2) 的接口:
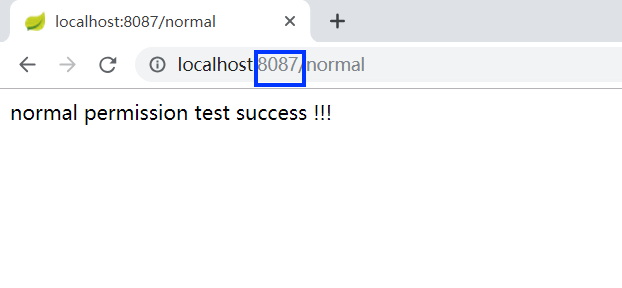
這就驗證了單點登陸SSO的功能了!
未完待續
受篇幅所限,本文應該說實踐了一下精簡流程的:SSO單點登陸和JWT權限控制,還有不少能夠複雜和具化的東西能夠實現,好比:
- 客戶端
client憑據 和 用戶user的憑據能夠用數據庫進行統一管理 - 認證
token也能夠用數據庫或緩存進行統一管理 - 受權認證中心的統一登陸頁面能夠自定義成須要的樣子
- 認證中心的受權頁也能夠自定義,甚至能夠去掉
- 包括一些異常提示也能夠自定義
總之,盡情地折騰去吧!
寫在最後
因爲能力有限,如有錯誤或者不當之處,還請你們批評指正,一塊兒學習交流!
- My Personal Blog:CodeSheep 程序羊
- 1. 基於Spring Security Oauth2的SSO單點登陸+JWT權限控制實踐
- 2. spring-security-oauth2(二十四) 基於JWT的SSO單點登錄
- 3. Spring Security OAuth2 SSO 單點登陸
- 4. Spring Security OAuth2基於JWT實現單點登陸
- 5. Spring Security基於JWT實現SSO單點登陸
- 6. 基於Spring Security + OAuth2 的SSO單點登陸(客戶端)
- 7. 基於Spring Security + OAuth2 的SSO單點登陸(服務端)
- 8. 基於Spring Security OAuth2的SSO(單點登陸)
- 9. Spring Security源碼分析十二:Spring Security OAuth2基於JWT實現單點登陸
- 10. OAuth2實現單點登陸SSO
- 更多相關文章...
- • Spring基於XML裝配Bean - Spring教程
- • Spring基於Annotation裝配Bean - Spring教程
- • ☆基於Java Instrument的Agent實現
- • Docker容器實戰(六) - 容器的隔離與限制
-
每一个你不满意的现在,都有一个你没有努力的曾经。
- 1. 基於Spring Security Oauth2的SSO單點登陸+JWT權限控制實踐
- 2. spring-security-oauth2(二十四) 基於JWT的SSO單點登錄
- 3. Spring Security OAuth2 SSO 單點登陸
- 4. Spring Security OAuth2基於JWT實現單點登陸
- 5. Spring Security基於JWT實現SSO單點登陸
- 6. 基於Spring Security + OAuth2 的SSO單點登陸(客戶端)
- 7. 基於Spring Security + OAuth2 的SSO單點登陸(服務端)
- 8. 基於Spring Security OAuth2的SSO(單點登陸)
- 9. Spring Security源碼分析十二:Spring Security OAuth2基於JWT實現單點登陸
- 10. OAuth2實現單點登陸SSO