watchOS開發—初步認識
Apple Watch
初步瞭解
- 簡介
- 項目演示
- 建立項目
- 簡單的hello world
- 項目結構
- Extension:位於用戶的iPhone安裝了對應的App上,包含咱們須要實現的代碼邏輯和其餘的資源文件
- watch app:目前只容許包含storyboard文件和resource文件
- InterfaceController:當前界面的控制器
- 與UIViewController的區別是:InterfaceController最終
繼承的是NSObject - InterfaceController
不會管理Watch APP的應用界面 - Watch APP的
界面是直接由Watch Kit來管理
- 與UIViewController的區別是:InterfaceController最終
- NotificationController interface的通知控制器
生命週期
- apple Watch啓動原理
- 用戶點擊Watch APP後,與Watch匹配的iPhone會啓動extension,而後與Watch創建鏈接,產生通訊
- NotificationController:
- Watch OS提供了默認的通知顯示,當用戶點擊通知進入APP時,就會調用如下兩個方法
- (void)handleActionWithIdentifier:(NSString *)identifier forLocalNotification:(UILocalNotification *)localNotification
{

}

- (void)handleActionWithIdentifier:(NSString *)identifier forRemoteNotification:(NSDictionary *)remoteNotification
{

}
- 經過這兩個方法得到通知的消息,跳轉到目標界面
- 在NotificationController中能夠實現如下兩個方法
- (void)didReceiveLocalNotification:(UILocalNotification *)localNotification withCompletion:(void (^)(WKUserNotificationInterfaceType))completionHandler {

}
- (void)didReceiveRemoteNotification:(NSDictionary *)remoteNotification withCompletion:(void (^)(WKUserNotificationInterfaceType))completionHandler {

}
- 得到通知內容,並設置處理完成的回調Block
- apple Watch的生命週期方法
init:用來初始化interface ControllerawakeWithContext:相似UIViewController中的viewDidLoad方法,用來配置interface ControllerwillActivity:界面將要顯示給用戶時會被調用,主要用來對試圖進行一些小的調整,大規模的初始化仍是放在init和awakeWithContextdidDeactivate:用來清空界面,程序進入不活動狀態,能夠用它來終止Timer或者來中止動畫,這個方法不能再對界面進行操做- command + L鎖定屏幕
@implementation InterfaceController

/**
 *  初始化當前控制器,子控制器不必定有值
 *
 *  @return 控制器
 */
- (instancetype)init {
    if (self = [super init]) {
        NSLog(@"初始化當前控制器,子控制器不必定有值 %s %d", __func__, __LINE__);
    }
    return self;
}

/**
 *  建立界面完畢,能夠在這個對子控制器賦值
 *
 *  @param context 界面裏的內容
 */
- (void)awakeWithContext:(id)context {
    [super awakeWithContext:context];

    // Configure interface objects here.
    NSLog(@"建立界面完畢,能夠在這個對子控制器賦值 %s %d", __func__, __LINE__);
}

/**
 *   即將進入程序,對界面作微調,具體的初始化應該放在 init 或者 awakeWithContext
 */
- (void)willActivate {
    // This method is called when watch view controller is about to be visible to user
    [super willActivate];

    NSLog(@"即將進入程序,對界面作微調,具體的初始化應該放在 init 或者 awakeWithContext %s %d", __func__, __LINE__);
}

/**
 *  清空界面,通常是用來中止動畫:timer
 */
- (void)didDeactivate {
    // This method is called when watch view controller is no longer visible
    [super didDeactivate];
    NSLog(@"清空界面,通常是用來中止動畫:timer %s %d", __func__, __LINE__);
}

@end
控件的基本使用
- 標籤
- 屬性:
- installed:是否安裝這個控件
- horizontal:水平方向如何顯示
- vertical:垂直方向如何顯示
- size:
- 自適應自身的寬高
- 與當前的界面的等寬高
- 設置固定寬高
- adjustment:微調控件的值
- (void)awakeWithContext:(id)context { [super awakeWithContext:context]; // Configure interface objects here. // 設置標籤的文字 [self.label setText:@"我是一個標籤"]; // 設置標籤的文字顏色 [self.label setTextColor:[UIColor redColor]]; } - 屬性:
- 按鈕
- 改變label的文字
- 改變按鈕的狀態和文字
- 按鈕背景圖片
- 搭建界面

- 代碼實現
- (void)awakeWithContext:(id)context {
    [super awakeWithContext:context];

    // Configure interface objects here.

    // 設置標籤文字
    [self.label setText:@"文字已經被改變"];
    // 設置標籤文字顏色
    [self.label setTextColor:[UIColor blueColor]];

    // 設置按鈕不可點
    [self.button setEnabled:NO];
    // 設置按鈕文字
    [self.button setTitle:@"不可dian"];
    // 設置按鈕背景圖片
    [self.button setBackgroundImage:[UIImage imageNamed:@"ad_00"]];
}
- 顯示效果
- 圖片
- 顯示一張圖片
- 代碼實現
- (void)awakeWithContext:(id)context {
    [super awakeWithContext:context];

    // Configure interface objects here.
    [self.image setImageNamed:@"ad_01.png"];
}
- 顯示效果
計算器
- 搭建界面
- 監聽事件
- 計算
控件的佈局
- group:一組是一個容器,它管理着在你的界面的其餘視圖的佈局。能夠指定背景顏色或圖像來顯示後面的組中的項目。
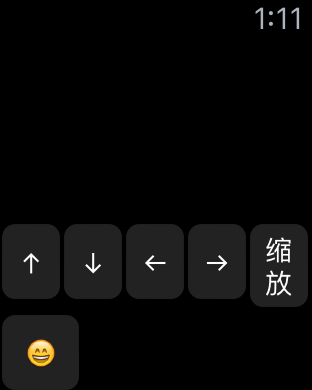
- 綜合小案例
- 使用storyboard
- github:https://github.com/CoderSLZeng/AppleWatch-GroupBall.git
/**
* 上
*/
- (IBAction)up {
// 設置動畫時長2.0秒
[self animateWithDuration:2.0 animations:^{
// 設置控件 垂直方向的位置
[self.ball setVerticalAlignment:WKInterfaceObjectVerticalAlignmentTop];
}];
}
/**
* 下
*/
- (IBAction)down {
[self animateWithDuration:2.0 animations:^{
[self.ball setVerticalAlignment:WKInterfaceObjectVerticalAlignmentBottom];
}];
}
/**
* 左
*/
- (IBAction)left {
[self animateWithDuration:2.0 animations:^{
// 設置控件 水平方向的位置
[self.ball setHorizontalAlignment:WKInterfaceObjectHorizontalAlignmentLeft];
}];
}
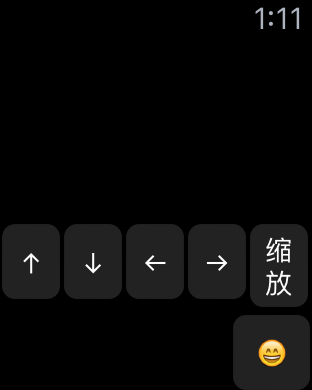
/**
* 右
*/
- (IBAction)rigth {
[self animateWithDuration:2.0 animations:^{
[self.ball setHorizontalAlignment:WKInterfaceObjectHorizontalAlignmentRight];
}];
}
控制器
- 控制器的跳轉
- 使用storyboard
- 使用代碼的方式
/**
 *  push方式跳轉控制器
 */
- (IBAction)push {
    /**
     *  name: 給控制器綁定一個Identifier:pushCtr
     */
    [self pushControllerWithName:@"pushCtr" context:nil];
}

/**
 *  moda方式跳轉控制器
 */
- (IBAction)moda {
    [self presentControllerWithName:@"modaCtr" context:nil];
}
- 控制器的建立
圖片瀏覽器
- 經過nextpage
- 界面搭建
- 顯示效果
WKDevice
// iOS
    UIDevice *device = [UIDevice currentDevice];

    // watch OS
    WKInterfaceDevice *interfaceDevice = [WKInterfaceDevice currentDevice];

    // 添加緩存圖片 (過程當中可能會添加失敗)2
    [interfaceDevice addCachedImage:[UIImage imageNamed:@"ad_00"] name:@"Zeng01"];
    [interfaceDevice addCachedImage:[UIImage imageNamed:@"ad_01"] name:@"Zeng02"];

    /**
     *  會先判斷圖片是否子啊緩存區內,若是在,直接取出來使用
     *  若是不在緩存區,就建立一個名字爲 ad_00 的圖片
     *  每個watch App 的緩存區最大不超過20M
     *  若是超過了20M,那麼就一次從最開始的緩存圖片開始刪除,用來存放新的緩存圖片
     */
    [self.showImage setImageNamed:@"ad_00"];


    // 從緩存區刪除緩存圖片
    [interfaceDevice removeCachedImageWithName:@"zeng02"];

    NSLog(@"全部的緩存圖片 = %@", interfaceDevice.cachedImages);

    /**
     *  獲取屏幕的大小
     *
     *  在42mm 的手錶下  屏幕大小是 : 寬:156 高: 195   312 X 390 資源圖片的像素
     *  在38mm 的手錶下  屏幕大小是 :  寬:  136  高: 170    272 X 340 資源圖片的像素
     */
    NSLog(@"當前屏幕的大小爲 = %@, 當前屏幕能夠縮放的比例 = %f", NSStringFromCGRect(interfaceDevice.screenBounds), interfaceDevice.screenScale);
顯示效果git
數據的共享
// 數據共享
    // iOS
    NSUserDefaults *iOSDefaults = [NSUserDefaults standardUserDefaults];
    [iOSDefaults setObject:@"xmgShareData" forKey:@"xmgKey"];

    // watch OS
    // 1. 打開target中 app Groups  (iOS 上的  和 watch OS 上的)
        //1.1 打開成功以後 須要你寫一個名字
    // 2. 使用如下方式建立數據庫
    NSUserDefaults *watchOSDefaults = [[NSUserDefaults alloc]initWithSuiteName:@"group.xmg"];

    [watchOSDefaults setObject:@"網絡太差" forKey:@"xmgKey"];
其它控件
- separator
- switch
- slider
- date
tableView
- 界面搭建
- 代碼實現
ShowCell.hgithub
@interface ShowCell : NSObject

- (void)setImageName:(NSString *)imageName title:(NSString *)title;

@end
showCell.m數據庫
#import "ShowCell.h"
#import <WatchKit/WatchKit.h>

@interface ShowCell ()

@property (unsafe_unretained, nonatomic) IBOutlet WKInterfaceImage *image;
@property (unsafe_unretained, nonatomic) IBOutlet WKInterfaceLabel *label;

@end

@implementation ShowCell
- (void)setImageName:(NSString *)imageName title:(NSString *)title
{
    [self.image setImageNamed:imageName];
    [self.label setText:title];
}
@end
InterfaceController.m瀏覽器
@interface InterfaceController()
@property (unsafe_unretained, nonatomic) IBOutlet WKInterfaceTable *tableView;

@end


@implementation InterfaceController

- (void)awakeWithContext:(id)context {
    [super awakeWithContext:context];

    // Configure interface objects here.
    [self.tableView setNumberOfRows:5 withRowType:@"row1"];

    for (NSUInteger i = 0; i < 5; i++) {

        // 獲取第i行的row
        ShowCell *cell = [self.tableView rowControllerAtIndex:i];
        // 賦值
        [cell setImageName:[NSString stringWithFormat:@"ad_0%d", i] title:[NSString stringWithFormat:@"第%d個", i + 1]];
    }
}

/**
 *  點擊了某行tableView
 */
- (void)table:(WKInterfaceTable *)table didSelectRowAtIndex:(NSInteger)rowIndex
{
    ShowCell *cell = [self.tableView rowControllerAtIndex:rowIndex];
    NSLog(@"%s", __func__);
}

- (void)willActivate {
    // This method is called when watch view controller is about to be visible to user
    [super willActivate];
}

- (void)didDeactivate {
    // This method is called when watch view controller is no longer visible
    [super didDeactivate];
}

/**
 *  添加一行
 */
- (IBAction)addRow {

    // 獲取tableView的最後一行
    NSIndexSet *indexSet = [NSIndexSet indexSetWithIndex:self.tableView.numberOfRows];

    // 插入一行
    [self.tableView insertRowsAtIndexes:indexSet withRowType:@"row1"];
    // 滾到哪一行
    [self.tableView scrollToRowAtIndex:0];
}


/**
 *  刪除一行
 */
- (IBAction)deleteRow {

    // 獲取tableView的最後一行
    NSIndexSet *lastIndexSet = [NSIndexSet indexSetWithIndex:self.tableView.numberOfRows - 1];
    // 刪除最後一行
    [self.tableView removeRowsAtIndexes:lastIndexSet];
}

@end
- 顯示效果
pickerView
- 界面搭建
- 代碼實現
@interface InterfaceController()
@property (unsafe_unretained, nonatomic) IBOutlet WKInterfacePicker *listPicker;
@property (unsafe_unretained, nonatomic) IBOutlet WKInterfacePicker *stackPicker;
@property (unsafe_unretained, nonatomic) IBOutlet WKInterfacePicker *sequencePicker;

@end


@implementation InterfaceController

- (void)awakeWithContext:(id)context {
    [super awakeWithContext:context];

    // Configure interface objects here.

    WKPickerItem *item1 = [[WKPickerItem alloc] init];
    item1.title = @"第1個";
    item1.contentImage = [WKImage imageWithImage:[UIImage imageNamed:@"ad_00"]];
    item1.caption = @"薯片真好吃";

    WKPickerItem *item2 = [[WKPickerItem alloc] init];
    item2.title = @"第2個";
    item2.contentImage = [WKImage imageWithImage:[UIImage imageNamed:@"ad_01"]];
    item2.caption = @"餅乾真好吃";

    WKPickerItem *item3 = [[WKPickerItem alloc] init];
    item3.title =  @"第3個";
    item3.contentImage = [WKImage imageWithImage:[UIImage imageNamed:@"ad_02"]];
    item3.caption = @"水療";

    WKPickerItem *item4 = [[WKPickerItem alloc] init];
    item4.title = @"第4個";
    item4.contentImage = [WKImage imageWithImage:[UIImage imageNamed:@"ad_03"]];
    item4.caption = @"湯真美味";

    WKPickerItem *item5 = [[WKPickerItem alloc] init];
    item5.title = @"第5個";
    item5.contentImage = [WKImage imageWithImage:[UIImage imageNamed:@"ad_04"]];
    item5.caption = @"餐廳";

    [self.listPicker setItems:@[item1, item2, item3, item4, item5]];
    [self.stackPicker setItems:@[item1, item2, item3, item4, item5]];
    [self.sequencePicker setItems:@[item1, item2, item3, item4, item5]];

}
- 界面顯示
Glance
- 工程建立
- 界面搭建
- 運行選項
alert
- 界面搭建
- 代碼實現
- (IBAction)showAlertView {

    WKAlertAction *doneAction = [WKAlertAction actionWithTitle:@"done" style:WKAlertActionStyleDefault handler:^{
        NSLog(@"done");
    }];

    WKAlertAction *destructiveAction = [WKAlertAction actionWithTitle:@"具備破壞性的" style:WKAlertActionStyleDestructive handler:^{
        NSLog(@"具備破壞性的");
    }];

    WKAlertAction *cancelAction = [WKAlertAction actionWithTitle:@"exit" style:WKAlertActionStyleCancel handler:^{
        NSLog(@"cancel");
    }];

    /**
     *  三種顯示方式
     *  WKAlertControllerStyleAlert,
     *  WKAlertControllerStyleSideBySideButtonsAlert,
     *  WKAlertControllerStyleActionSheet,
     */

    // Action依次排序的
//    [self presentAlertControllerWithTitle:@"Demo" message:@"Action依次排序的" preferredStyle:WKAlertControllerStyleAlert actions:@[doneAction, destructiveAction, cancelAction]];

    // 只須要兩個Action 一個Action就至關於一個按鈕,不然報錯
//    [self presentAlertControllerWithTitle:@"Demo" message:@"只須要兩個Action 一個Action就至關於一個按鈕,不然報錯" preferredStyle:WKAlertControllerStyleSideBySideButtonsAlert actions:@[doneAction, cancelAction]];

    // 退出在左上角
    [self presentAlertControllerWithTitle:@"Demo" message:@"退出在左上角" preferredStyle:WKAlertControllerStyleActionSheet actions:@[doneAction, destructiveAction, cancelAction]];
}
- 顯示效果
- 初始化界面
- WKAlertControllerStyleAlert
- WKAlertControllerStyleSideBySideButtonsAlert
- WKAlertControllerStyleActionSheet
動畫
- 漸變更畫
- 平移動畫
- hidden動畫
- 形變更畫
- 界面搭建
- 代碼實現
/**
* 上移
*/
- (IBAction)moveUp {
[self animateWithDuration:2.0f animations:^{
[self.ball setVerticalAlignment:WKInterfaceObjectVerticalAlignmentTop];
}];
}
/**
* 下移
*/
- (IBAction)moveDown {
[self animateWithDuration:2.0f animations:^{
[self.ball setVerticalAlignment:WKInterfaceObjectVerticalAlignmentBottom];
}];
}
/**
* 左移
*/
- (IBAction)moveLeft {
[self animateWithDuration:2.0f animations:^{
[self.ball setHorizontalAlignment:WKInterfaceObjectHorizontalAlignmentLeft];
}];
}
/**
* 右移
*/
- (IBAction)moveRight {
[self animateWithDuration:2.0f animations:^{
[self.ball setHorizontalAlignment:WKInterfaceObjectHorizontalAlignmentRight];
}];
}
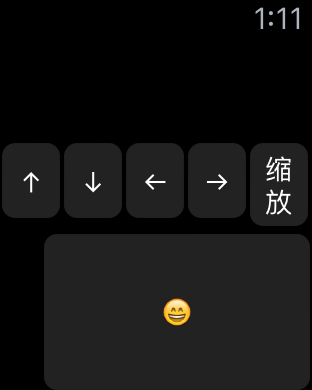
/**
* 縮放
*/
- (IBAction)MoveZoom {
[self animateWithDuration:2.0f animations:^{
[self.ball setRelativeWidth:0.8 withAdjustment:10];
[self.ball setRelativeHeight:0.4 withAdjustment:10];
}];
}
顯示效果緩存
相關文章
- 1. 【UE4_C++】 初步認識UE4 開發工具
- 2. 對開發初步認識和體驗
- 3. 初步認識AutoMapper
- 4. 初步認識Hive
- 5. Nginx 初步認識
- 6. 初步認識JUnit
- 7. 初步認識Vuex
- 8. 初步認識vue.js
- 9. 初步認識ajax
- 10. DNS初步認識
- 更多相關文章...
- • MySQL默認值(DEFAULT) - MySQL教程
- • Spring使用AspectJ開發AOP:基於XML和基於Annotation - Spring教程
- • PHP開發工具
- • 適用於PHP初學者的學習線路和建議
相關標籤/搜索
每日一句
-
每一个你不满意的现在,都有一个你没有努力的曾经。
歡迎關注本站公眾號,獲取更多信息

相關文章
- 1. 【UE4_C++】 初步認識UE4 開發工具
- 2. 對開發初步認識和體驗
- 3. 初步認識AutoMapper
- 4. 初步認識Hive
- 5. Nginx 初步認識
- 6. 初步認識JUnit
- 7. 初步認識Vuex
- 8. 初步認識vue.js
- 9. 初步認識ajax
- 10. DNS初步認識